How to Find a File Path on Mac (2023 Ultimate Guide)
If you’re a Mac user, you might have encountered the Mac file opener virus which makes it difficult to locate your files. This can be frustrating, especially if you’re in a rush. However, there’s a more efficient way to find files on your Mac without wasting time.
By learning how to find file paths on Mac, you can easily locate your files without having to manually go through each folder. In this article, we’ll guide you on how to find file paths on Mac and introduce you to a tool that can quickly uncover hidden and forgotten files. By the end of this article, you’ll be able to locate your files in a shorter amount of time, leaving you with more time to focus on being productive.
Part 1. Why You Should Know the Full Path of a File
Knowing the full path of a file on your Mac is crucial, especially if you’re dealing with the Mac file opener virus. It’s common to have trouble locating a file or folder, and using the Finder to search for it may not give you the complete file path, resulting in wasted time navigating through different areas on your Mac.
By learning how to find file paths on Mac, you can easily locate the files you need and even delete them completely, freeing up space on your device. Additionally, understanding file paths is essential for downloading, uploading, and organizing files effectively. Don’t let the Mac file opener virus or any other file-related issues slow you down – read on to discover how to find file paths on Mac.
It’s important to know the full path of a file on your computer for several reasons. Firstly, if you’re unable to locate a file that you urgently need, knowing the file’s complete hierarchy can help you quickly find it. Secondly, understanding file paths are crucial for effective file management, especially when downloading, uploading, or organizing files.
Furthermore, deleting a file without knowing its full path can leave behind remnants that take up space on your device, making it essential to understand how to find file paths on your computer.
Part 2. How to Find a File Path on Mac Quickly
If you’re dealing with the Mac file opener virus and need to quickly locate a file, learning how to find file paths on your Mac can save you a lot of time. Here’s one easy way to find a file path on Mac:
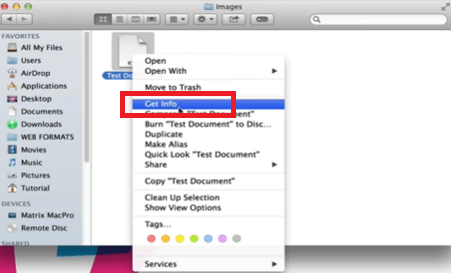
Option #1: Use Get Info Start by searching for the file using Finder. Once you’ve found it, right-click on the file and select Get Info from the drop-down menu. In the pop-up box that appears, look for the General section and locate the “Where” field. The file path of the file will be displayed there. By following these simple steps, you can easily find a file path on your Mac and get back to being productive.
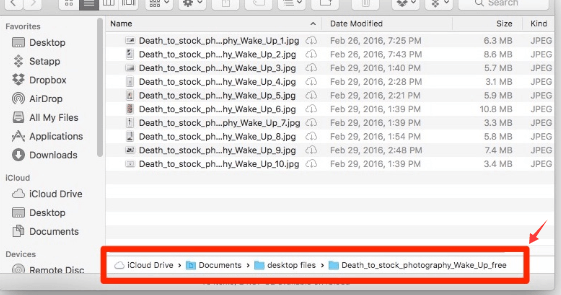
Option #2: Use View First, open Finder, and ensure that the window remains open. Next, click on “View” from the top menu and scroll down to locate “Show Path Bar.” Once you click on this option, the full file path will appear at the bottom of the Finder window. This method allows you to right-click on any of the folders within the file path and access the enclosing folder. With this information, you can easily find the location of the file you need and manage your files effectively on your Mac.
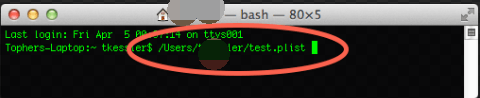
Option #3. Utilize the Terminal If you prefer using the Terminal, you can also find the full file path that way. Follow the steps below to learn how.
- Step 1. Open the Terminal As an admin, open the Terminal through the Finder by typing “Terminal” and pressing “Enter.”
- Step 2. Enter the Possible Path Name Type “find” and then a possible name for the file you are searching for.
- Enter Possible Path Name
- Step 3. Examine Found Files Once you hit “Enter,” the Terminal will display a list of files that match or are similar to the name you entered. Review the files and copy and paste the file path into the Finder to check if it’s the file you were searching for.
Part 3. Bonus: How to Find Hidden Files on Mac
Discovering Hidden Files on Mac: The Easy Way Uncovering hidden files on your Mac can be quite challenging. With the abundance of files that are stored on your computer, it can be difficult to remember every location they’re saved. Luckily, there are tools available that can assist with this task. One such tool is the Mac Cleaner, which scans every nook and cranny of your Mac to find hidden files. This tool comes equipped with various modules, such as Junk Cleaner, that search for files taking up unnecessary space.
This Mac cleaning tool is user-friendly and can be used by anyone. By clicking on any of the modules, you can access the SCAN tab and begin the scanning process. Once completed, a list of files from the selected module is displayed, and you can choose which files to clean out. It’s that simple! If you’d like to learn more about the Mac Cleaner, you can start a free trial today.
Step #1: Download, Install, and Launch Mac Cleaner
The first step is to download, install, and launch Mac Cleaner. To begin the process, you must first obtain access to the software. You can do this by visiting the Mac Cleaner download page and clicking the “Download Now” button. This will initiate the download of a DMG file which you will need to open to run the installer. Follow the onscreen instructions throughout the installation process. Once the installation is finished, the Mac Cleaner software will automatically open.

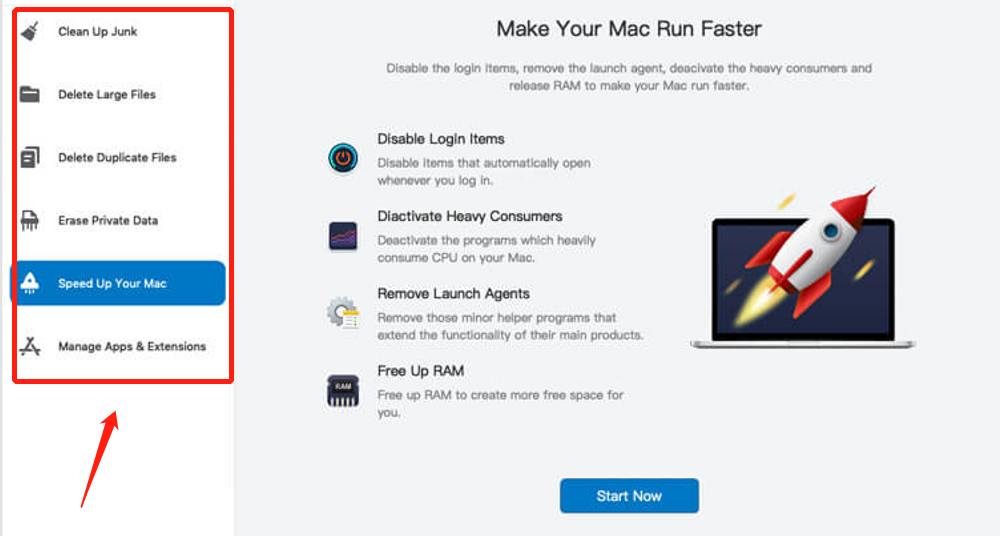
Step #2: Choose a Cleaner Module
you need to choose a cleaner module. On the left-hand side of the software, you’ll see six options, which are the modules provided by Mac Cleaner. These options include (1) Clean Up Junk, (2) Delete Large Files, (3) Delete Duplicate Files, (4) Erase Private Data, (5) Speed Up Your Mac, and (6) Manage Apps & Extensions.
While each module has its own unique functionality, you only need to use the first three modules, which are known as the cleaner modules, if your goal is to free up storage space. Here’s what each module can do:
- Clean Up Junk scans your computer for files that are considered unnecessary or junk, such as System Junk, App Junk, Trash Bin, iOS Junk, iTunes Junk, and Unused Disk Images.
- Delete Large Files specifically looks for files that are 50MB or larger, regardless of their type. It only detects files that are unnecessary, so you don’t have to worry about accidentally deleting important files.
- Delete Duplicate Files checks every file within a folder and searches your computer for extra copies of those files. It creates a list of duplicate files that it finds and allows you to delete them.
To select a module, simply click on the option from the left side of the interface.
Step #3: Scan Your Mac for Files
To scan for files on your Mac, this step is essential regardless of the module you select. The approach to this step may vary depending on the module you choose. Here are the instructions for each cleaner module:
- Clean Up Junk: The interface will display two sides – Quick Clean and Deep Clean. Quick Clean scans for System Junk, App Junk, Trash Bin, and iTunes Junk. Deep Clean scans for all of the above plus Downloads, iOS Junk, and Unused Disk Images. After selecting the desired option, click the Scan button.
- Delete Large Files: Simply click the Scan button to initiate the process.
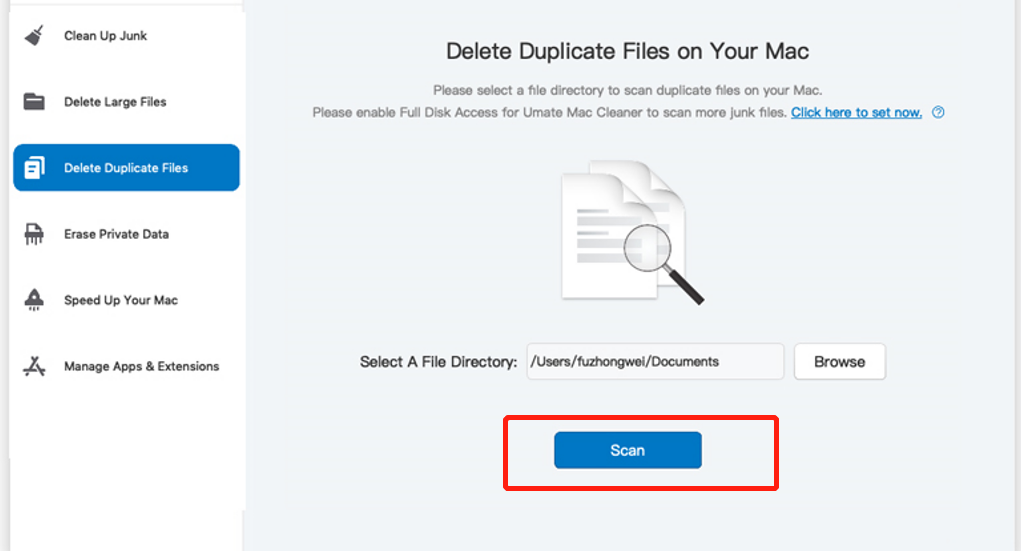
- Delete Duplicate Files: Begin by specifying the directory you wish to scan. To do this, click the Browse button in the center of the interface and navigate to the desired directory. Once selected, click the Scan button.
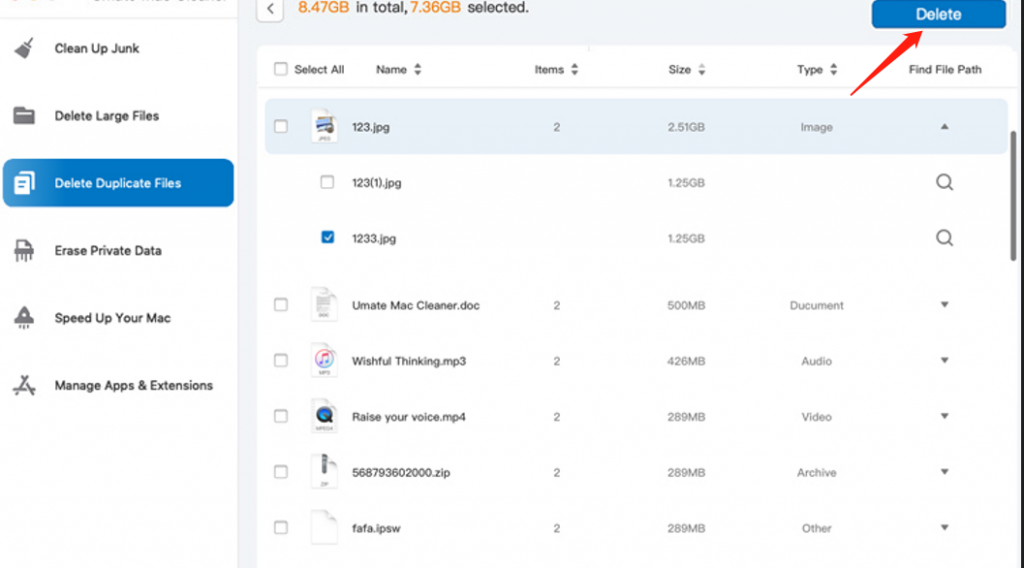
Step #5: Delete the File/s
To complete the process, simply click the blue button at the top-right corner of the window. The button will either say “Delete” or “Clean” depending on the module. This will initiate the deletion process, which may take some time to finish.
Conclusion
In conclusion, finding the file path of a file on a Mac can be crucial in managing and organizing your files. Knowing the full path of a file can save you time and effort in searching for it, and it can also help you in deleting files completely without leaving any remnants on your Mac.
There are different options to find the file path on Mac, such as going to Get Info, using the View option, or using the Terminal. Additionally, tools like the Mac Cleaner can help you find hidden files on your Mac and manage your files more efficiently. By using these methods and tools, you can easily locate and manage your files on your Mac.
Latest Articles