

If you’ve never used a macOS computer before and are just using it now, chances are you have no idea how to go about using some of its features. Of course, not knowing some of these features doesn’t necessarily mean it’ll be bad for your computer, but there are some that can actually be a lot of trouble if you didn’t know how to use them. Clearing the Trash is one such example.
Anyone who doesn’t know how to clear Trash on Mac will often find themselves questioning why their computer is always running out of disk space. This is because if you don’t empty it every now and then, the files in the Trash can pile up slowly.
As a result, the Trash folder alone can take up tens of GBs worth of disk space from your computer, thereby resulting in the frequent “running out of space” issue. If that’s what’s been bothering you lately, read on as this guide tackles how to clear Trash on Mac and other relevant matters. But first, let’s talk about why you need to know how to clear it in the first place.
Why Do You Need to Clear Trash on Mac?
It’s common knowledge that when you delete an item on your macOS computer, the file goes directly to the Trash. But what most people don’t know is that when the file or folder is inside the Trash, it still takes up disk space, similar to when it was outside. So, if you deleted a 10GB folder on your computer, for example, if you look at your storage capacity, it won’t change since it’s still in the Trash. Only when you delete that folder from the Trash will you truly remove 10GB from your storage.
That’s one of the main reasons why it’s important that you know how to clear Trash on Mac. Another reason is that when a hacker gets into your system, they can still access the Trash and get your important files that might’ve been in it.
Of course, it’s not as impactful or likely as the other reason, but it’s still a reason nonetheless. With that in mind, read on as this article tackles four ways on how to clear Trash on Mac. Let’s start with perhaps the easiest and simplest method.
Method #1: Empty Trash Via The Dock
The Dock is the task bar of macOS computers. It’s located at the bottommost part of the screen and it shows you app icons that you pinned in the past. Of course, if you haven’t pinned any app before, there will still be items here since the system, by default, has several apps pinned. One such app is the Trash, so you’ll most likely find a Trash icon at the Dock of your macOS computer, and it’ll play a crucial role in this first method. Here’s how you can empty the Trash via the Dock:
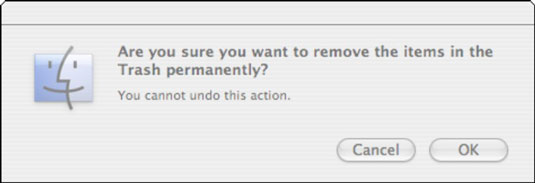
- Click on the Trash icon from the Dock of your computer while holding the Ctrl key on your keyboard.
- Select Empty Trash from the resulting dropdown menu.
The main issue with this method is that since you’re not entering the Trash app, you won’t know what files you’re deleting, meaning there might be an important file inside that you deleted. If you’re the cautious type and you want to ensure you don’t delete an important file unintentionally, you can instead use the second method.
Method #2: Clear Trash Using The App
The second method is also rather simple. You just need to open the Trash app and empty it after doing so. It’s a much less risky method since you can ensure that you’re not permanently deleting any important file. Here’s how you can do this:
- Open the Trash app by clicking on it from the Dock.
- Find the files you no longer need. If there are files that you actually need, then you should recover them first. You can do so by control-clicking on an item and selecting Put Back from the resulting dropdown menu.
- At the top menu bar of the window, click Empty Trash.
Method #3: Empty Trash Via Finder
You can also empty the Trash via Finder. If you don’t know, Finder is the file management app for macOS computers. Since Trash is technically still a directory, you can manage it using the Finder app. Here’s what you need to do for this method:
- Open the Finder app.
- Click Finder from the top menu bar.
- Select Empty Trash.

Method #4: Launch Mac Cleaner
It’s usually relatively easy to clear Trash on Mac, especially now that you know the different methods. However, there are instances where you cannot clear the Trash, much less delete a single file from it. Perhaps the directory was encrypted somehow. Maybe there’s an error preventing you from doing so, like when the system says a file inside the Trash is currently open when it obviously isn’t the case. In those instances, you’ll most likely need the help of tools like Mac Cleaner.
Mac Cleaner is a cleaning app that can delete certain files from your computer. Coincidentally, the Trash is one of the targets of the software, so you can clear it without issue. Furthermore, the software can bypass any protection and even error messages that may appear on your screen. With that said, here’s how to clear Trash on Mac with Mac Cleaner:
Step #1: Open Mac Cleaner on Your Computer
Before anything else, you need to get the software on your computer first. To do that, open a browser and click this link. It’ll take you to the Mac Cleaner download site from which you must click the button that says Download Now. Upon doing so, the browser will download a DMG file, which you must then open once the download is complete. It’ll open the installer, and you simply have to follow the onscreen instructions. The software opens automatically once it’s installed.
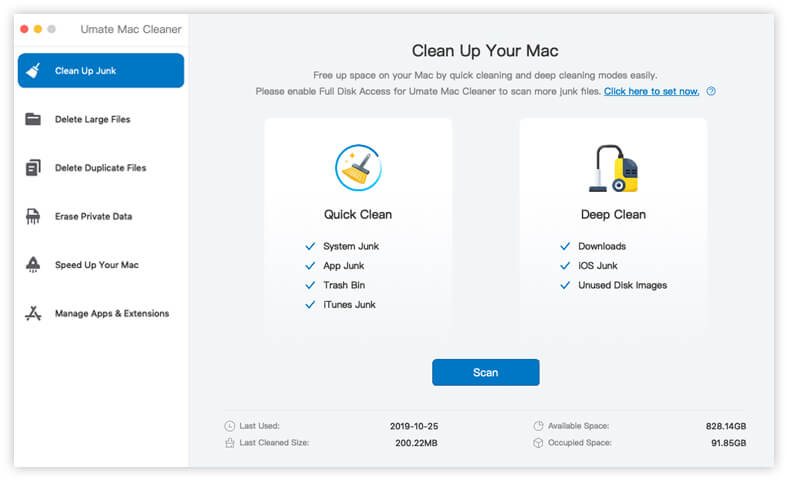
Step #2: Select Clean up Junk
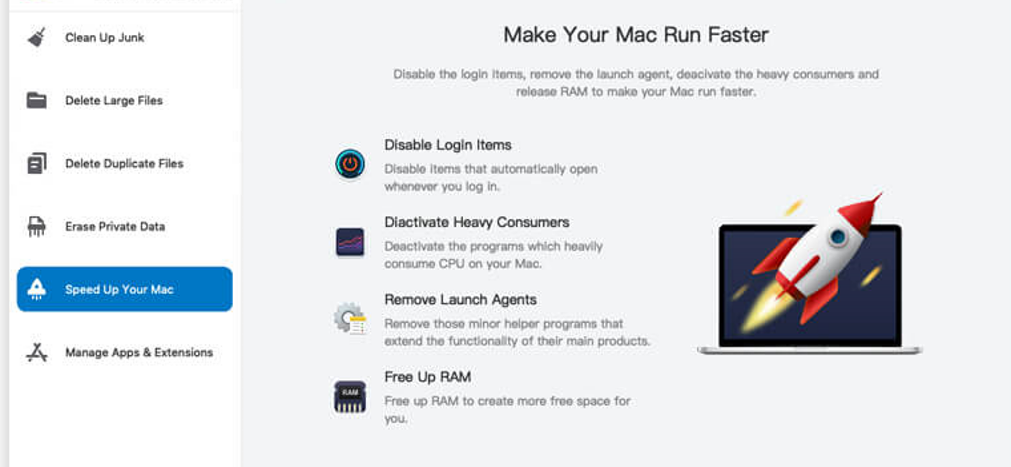
Mac Cleaner currently has six modules, which you must find on the left side of the interface. These include (1) Clean Up Junk, (2) Delete Large Files, (3) Delete Duplicate Files, (4) Erase Private Data, (5) Speed Up Your Mac, and (6) Manage Apps & Extensions. For your purposes, you’ll only need the help of the first module, Clean Up Junk, as it allows you to detect and delete junk files like System Junk, App Junk, iOS Junk, iTunes Junk, Downloads, and most importantly, the Trash Bin.
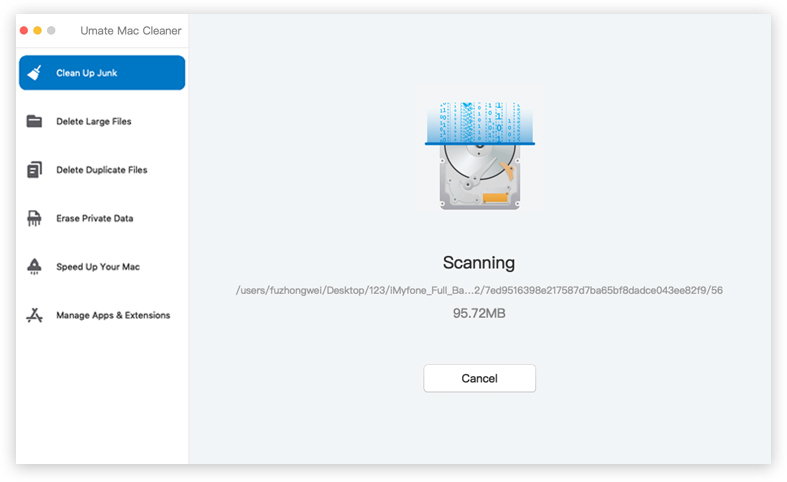
Step #3: Click the Scan Button
Once you select Clean Up Junk, the software will split into two. One side says Quick Clean while the other says Deep Clean. Quick Clean allows you to get rid of System Junk, App Junk, Trash Bin, and iTunes Junk in the fastest way possible. Deep Clean has a bit of a slower scanning process but it can detect more files, including the aforementioned categories as well as Downloads, iOS Junk, and Unused Disk Images. You can choose either one as both options can scan Trash Bin. After you select an option, simply click the Scan button at the bottom area of the interface.
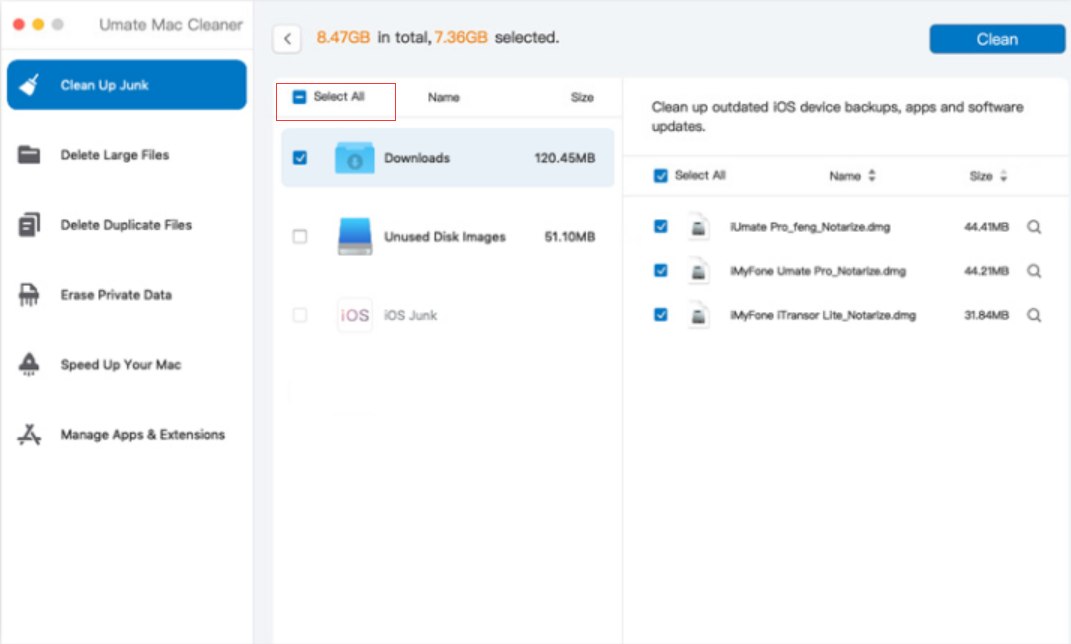
Step #4: Pick a File Category and File/s
Once the scan is complete, the software will take you to the next page where you’ll find a list on the left side. The list consists of categories that were mentioned earlier, such as System Junk, Downloads, Trash Bin, Unused Disk Images, etc. To proceed, select a category from the list, which in your case, should be Trash Bin. Upon doing so, a new list will appear on the right side of the interface, from which you’ll find actual files that belong to the selected category. Simply select the files you want to delete from the Trash Bin by clicking on their corresponding checkboxes. You can also click Select All to include all items.
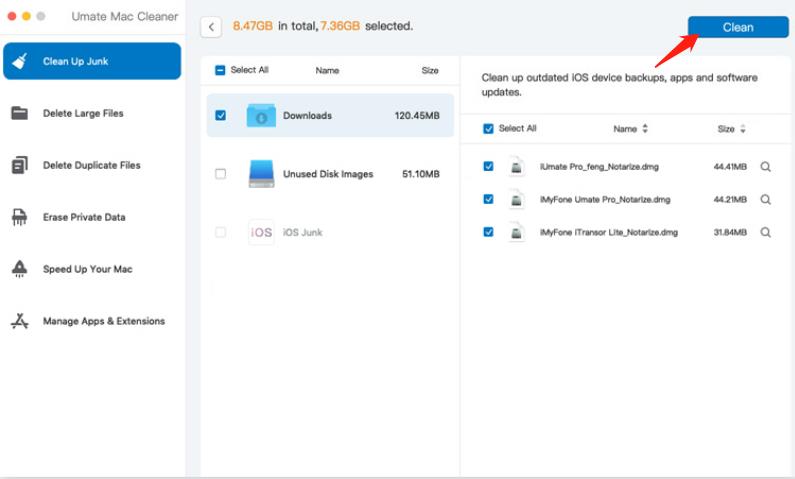
Step #5: Delete the File/s
The last step is to simply execute the deletion process of the selected files. To do so, you have to click the button at the upper right corner of the interface that says Clean. It’ll take a few seconds or minutes, but that’s the last thing you need to do.
Keep in mind that this particular feature isn’t designed to be the “easier” method on how to clear Trash on Mac. Rather, it’s designed to be the surefire method, since there are instances where you cannot clear the Trash. But then again, if you know how to use Mac Cleaner, it doesn’t take much time and effort to use it to empty the Trash Bin.
Takeaways
The Trash is an essential component of a macOS computer. It stores all the files you deleted for the past 30 days, and it’s what allows you to recover those files if you ever find the need for them in the future. Since they take up storage space when in the Trash, it’s important that you regularly empty them, and you can do so with this guide. Of course, you have other options, like enabling the automatic empty feature or using a software like Mac Cleaner. Regardless, you must always monitor the Trash in case it’s what’s causing the storage problem you’re facing at the moment if there’s any.
Latest Articles