

Whether you like it or not, your Mac will almost always contain unwanted files in its disk space. After all, whenever you open the computer, the system automatically creates files that aren’t necessarily “crucial” to its operation. It’s also possible that some of the files you downloaded from the internet or copied from other storage drives are no longer needed.
Though a Mac computer has a relatively large disk space, the files it has accumulated over several months or years will pile up. Eventually, your Mac’s disk space will be too full. This can be bad news since a computer’s free disk space is one of the factors that affect its performance. Therefore, if there’s insufficient disk space on your Mac, it’ll slow down considerably. With that in mind, this article will discuss how to delete files on Mac so your computer doesn’t come to that point. But before we get to those methods, you must first prepare your Mac so you don’t lose important files in this operation.
Method #1: Delete Files According to Data Type
If one wishes to check their storage on Mac, they usually go to the About This Mac area, and just leave afterward. However, if you look closely at this section, you’ll notice that there’s a section here that allows you to delete files on Mac.
Here’s how you can use that particular section to delete files:
- Click the Apple icon from the top-left corner of the screen.
- Select About This Mac.
- Navigate to the Storage tab.
- Click the Manage… button.
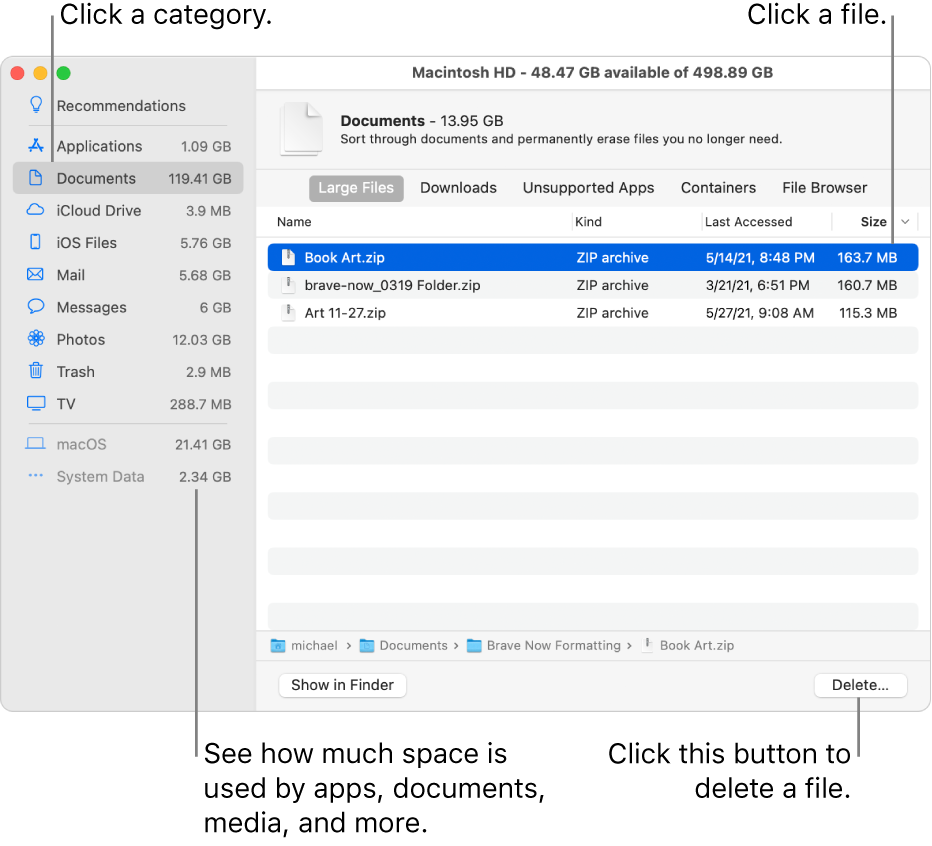
- On the left side of the Storage Management window, you’ll find numerous file types, including Documents, Mail, Messages, and the likes. Simply navigate to a file type that you wish to delete.
- Upon selecting a file type, you’ll get a list of files that belong to that data type. Select the files you want to delete.
- Click the Delete… button from the bottom-right corner of the screen.
This is arguably the most traditional method of deleting files on Mac, except of course, when you find and delete files manually. The Manage… button is available on all models of Mac computers, so this feature should be available in yours.
Method #2: Delete Files Using the Finder App
The Finder app is essentially the Apple counterpart of File Manager from Windows. It allows you to move from one directory to another seamlessly. Using the Finder app, you can find files very easily using the Go to Folder function, which is basically the file search feature of Apple. Here’s how you can use the Finder app, or more specifically, its Go to Folder function, to fi0nd and delete files:
- Click the Finder icon from your computer’s Dock.
- On the Finder window, click Go from the top menu bar.
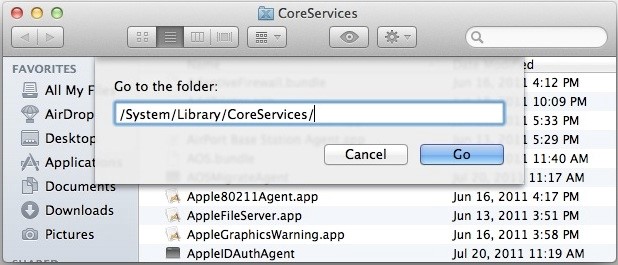
- Select Go to Folder from the resulting dropdown menu.
- Type in the directory where you want to go. Here’s a sample format: /Library/Fonts/ or ~/Pictures/
- Click Go.
- You’ll be taken to the directory you typed in. Simply delete the files you wish to delete from the directory.
Alternatively, you can simply use the Finder app to move from one directory to another in the traditional way. You simply have to use the navigation options found on the left side of the window to go to different directories.
Method #3: Delete Hidden Files
Even if you delete all the files within a directory, you’ll notice that you actually haven’t deleted all the files in that directory as it still doesn’t say 0MB in its storage space. This is mainly because there are files that you normally can’t see. We call these hidden files, and though they are normally hidden, you can still delete them using the following steps:
- Open a session of Finder.
- Go to the directory where you suspect there are hidden files.
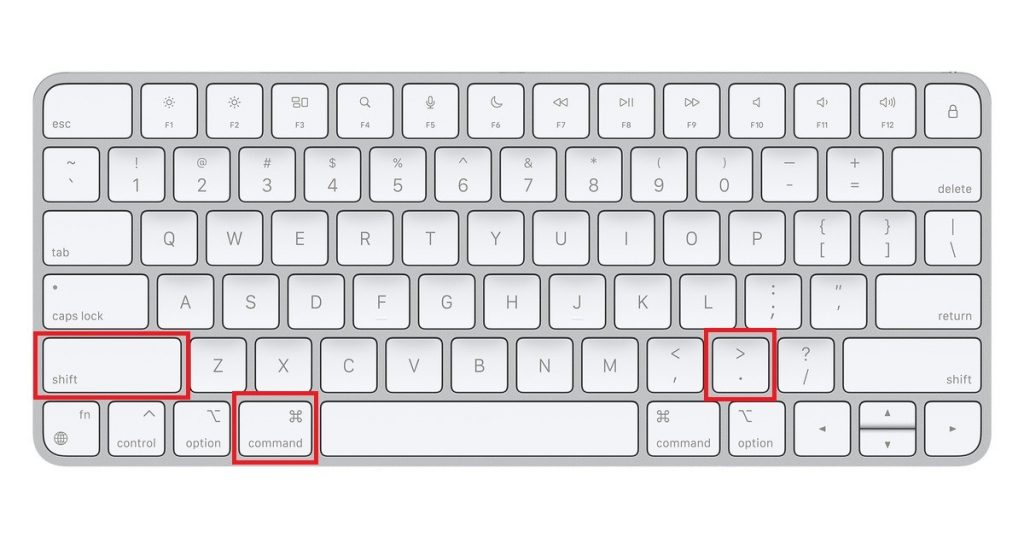
- Press the three keys Command, Shift, and period (.) together. This will unhide the hidden files, or at least make them translucent in the folder. You can press the same key combination to undo the effect.
- Select the hidden files.
- Press Delete.
With this, you can very easily delete hidden files on your Mac computer.
Method #4: Delete Files Permanently
If you don’t want to go through the hassle of deleting the file, and deleting it again in the Trash, we suggest holding the Option + Command keys on your keyboard while pressing Delete. Doing so will permanently delete that file, meaning it will no longer move to the Trash. This will eliminate the hassle of having to delete files twice. But beware that this may increase the possibility of permanently deleting important files, so only do this if you’re certain you don’t have any essential files.

Method #5: Delete Unwanted Files with Mac Cleaner [RECOMMENDED]
Although each of the aforementioned methods takes a different approach to file deletion—they all pose the risk of deleting some of your important files permanently. That’s why experts often recommend users use a storage cleaner before anything else. As the name suggests, storage cleaners are programs that specialize in deleting unnecessary files from your computer. What makes this method unique is the fact that most storage cleaners can detect which files are necessary, and which are not. Because of this, there’s almost always zero risk of deleting your important files when using a storage cleaner.
If you wish to use this method, we recommend Mac Cleaner—a modular software that offers numerous features, all of which work towards ridding your Mac storage of unwanted files. Below are the steps you must follow to use this software:
Step #1: Download, Install, and Open Mac Cleaner
On your computer, open a browser and head to the Mac Cleaner website. There, click the Download Now button, prompting the download of the installer. Upon download completion, run the file, install the software, and open it afterward.
Step #2: Select from Six (6) Different Modules
After opening Mac Cleaner, you’ll notice there are several options on the left sidebar of the interface. These are the six different modules the software has to offer. Here’s a look at what each module does and how it can help delete files:
- Clean Up Junk inspects your storage for any junk file, which is basically a file that’s not necessary. Examples of junk files that this module can detect from your computer are System Junk, App Junk, Trash Bin, etc.
- Delete Large Files scours your computer for files with a size of 50MB or higher. Its main goal is to free a considerable amount of space in your storage. It only detects large files that are no longer necessary.
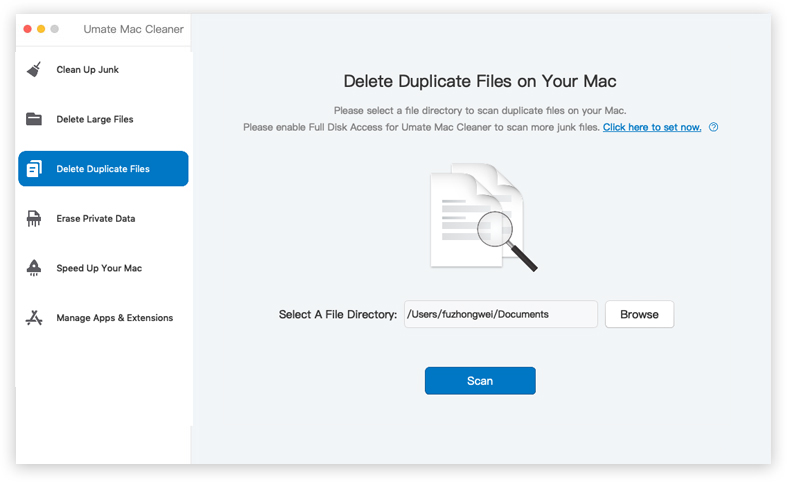
- Delete Duplicate Files scans your computer for files that have more than one copy in the Mac storage. Unlike the previous two modules, it will detect all files, regardless of importance. Hence, you might accidentally delete a file that you intentionally copy-pasted for whatever reason.
- Erase Private Data looks for files that can be considered “private” data. It’s a rather vague description, but examples of private data include email attachments, login history, online traces, and chat data.
- Speed Up Your Mac allows you to boost your computer’s performance through four functions.
- Manage Apps & Extensions can remove extensions and uninstall applications from your computer.
Since your main goal is to delete files on Mac, we suggest choosing between the first four modules. You can also try out all four. The last two are mainly for optimizing your Mac’s performance, which doesn’t align with your goals.
To select the module, simply click it from the left sidebar.
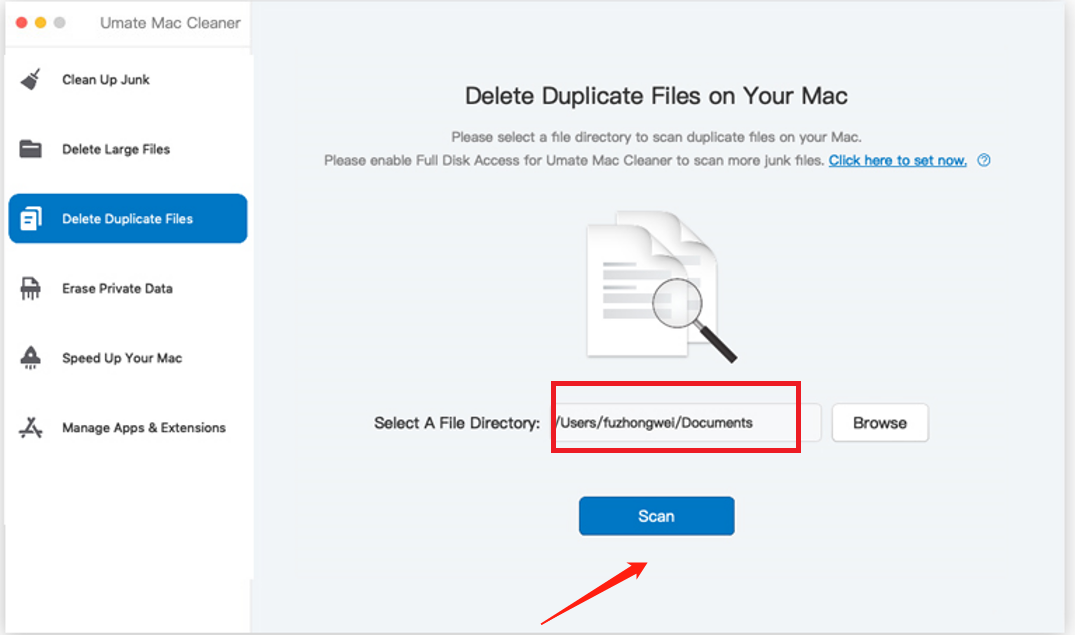
Step #3: Scan the Computer for Files
Once you’ve selected a module, the interface will display information about its functionalities. We suggest reading through the information to learn more about its features. After reading, click the Scan button at the center of the interface.
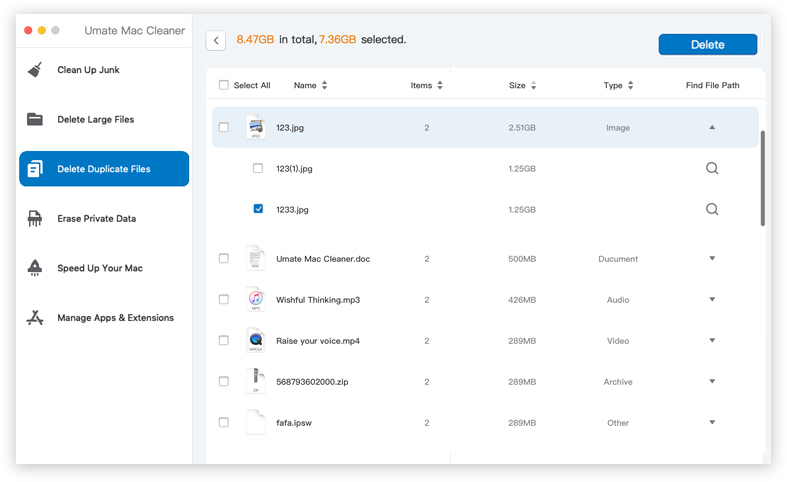
Step #4: Choose an Item/s
The software will then initiate a scan. After scanning, the software will display the scanned files on the left sidebar. These are files you can delete from your computer. Simply choose the ones you wish to delete by clicking on their respective checkboxes. You may also click the Select All checkbox if you want to include all files for your selection.
Step #5: Delete the File/s
After confirming that you’ve selected all the files due for deletion, click the button found at the top-right corner of the screen, which should read Clean, Erase, or Delete, depending on the module. This will finalize the file deletion process.
As you can see, with the right software, it’s fairly easy to delete files on your Mac. It doesn’t require you to go to different parts of your computer, unlike when you were using the traditional methods. However, keep in mind that not all software has such functionalities. That’s why we suggest sticking with Mac Cleaner if you have no better option.
Parting Words
As much as you’d like to prevent data loss, there will come a time when your Mac can no longer handle the large amounts of files in its storage. At that point, you must come to the decision of deleting files from the computer. If you haven’t done this before, you’d assume that it takes several hours. Though that is true, it only applies if you use the traditional methods mentioned in this guide. But if you use software like Mac Cleaner, you can accomplish the task within a few minutes.
Latest Articles