

A macOS consists of numerous subsystems, with each one playing a different role from the others. These roles can be anywhere from storage management to performance optimization. Of course, while they do operate in unison with other subsystems, certain parts of a computer may malfunction. Since not all subsystems have the same mechanisms, certain subsystems malfunction more frequently than others. In the case of macOS computers, PRAM and SMC are two such subsystems. Naturally, when these subsystems malfunction, you’ll often find the computer struggling to operate normally.
In such cases, the best course of action would be to reset PRAM and SMC on Mac, but how do you do this? To answer that question, you must first understand what these two subsystems do and their respective roles on macOS computers.
Part 1: A Brief Overview of The PRAM
PRAM stands for Parameter Random Access Memory, and this subsystem contains information related to your Mac computer’s operating system. These may include information like your computer’s display settings, speaker volume, and time zone. Though it’s a type of RAM, which is known to contain information temporarily, the contents of PRAM aren’t temporary and don’t get cleared every time you shut down and open your Mac computer.
However, any info PRAM contains is stored in small batteries, which often overworks itself when the information becomes too much. When that happens, you’ll most likely encounter issues on your Mac, at which point, you must reset PRAM.
When you face issues with the PRAM, you’ll often encounter issues related to connectivity or display. For instance, your Mac may struggle to connect to the internet if PRAM malfunctions. Your computer may also show strange behaviors in its display, such as flickering lights, incorrect time and date on the clock, and many more. That’s often why experts advise Mac users to reset the PRAM regularly, even if they’re not facing issues.
Part 2: How to Reset PRAM on Mac
If you want to follow the advice of experts, naturally, you’ll have to figure out how to reset PRAM first. Fortunately, for most Mac computers and laptops, resetting the device also means resetting the PRAM, but that’s not the case with other Macs.
In those cases, here’s what you need to do:
- Shut down your Mac computer.
- Disconnect all the devices connected to the computer via USB, with the exception of the keyboard.
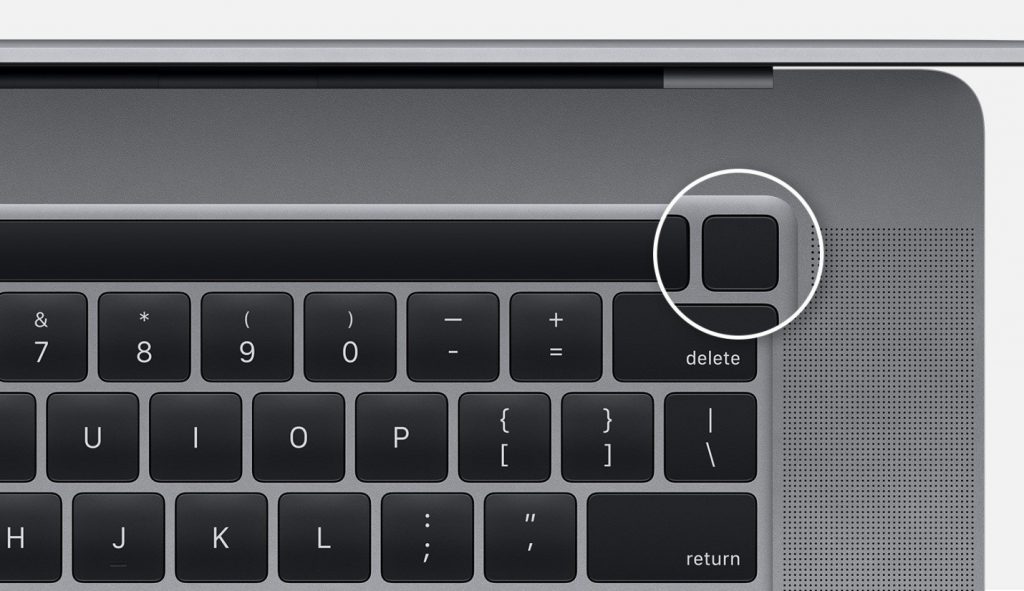
- Start the Mac computer by pressing the power button.
- Immediately after pressing the power button, press the Option, Command, P, and R keys at once. Make sure you do so before the gray screen appears. If you’re even a second late, repeat the entire process.
- Hold down these keys for at least 20 seconds.
- After reaching the 20-second mark, release the keys and let the Mac computer boot up as usual.
At this point, the PRAM should already be reset to its default state. Of course, you should expect that your user settings will also reset.

Part 3: A Brief Overview of The SMC
SMC stands for System Management Controller, and it basically manages the physical components of your Mac computer, including the cooling fans, power supply, and status lights. Of course, the SMC doesn’t have full control over these pieces of hardware, but if you’re facing issues related to these components, the SMC is likely to be the culprit. In such cases, the best course of action would be to reset the SMC, which should then reset the hardware components to their default configurations.

Part 4: How to Reset SMC on Mac
If you wish to reset the SMC on your Mac, here’s what you need to do:
- Shut down your Mac computer.
- Press and hold down the power button for at least 10 seconds.
- Release the button after 10 seconds.
- Wait for a few seconds, then restart the computer.
- That’s the quick reset for SMC. If that doesn’t work, here’s how to hard reset the SMC:
- Shut down the Mac computer.
- Press the left Control, left Option, and right Shift keys and hold them for 7 seconds.
- After 7 seconds have passed, press and hold the Power button. Make sure you’re still holding the other three keys.
- Hold these four keys for at least another 7 seconds.
- Wait until your Mac turns on, and then wait for it to turn off again automatically.
- Once it turns off completely, release the keys.
- Wait for a few seconds, then restart the Mac again.
By resetting the SMC on your Mac, you can solve issues like hardware-related issues such as overheating, WiFi problems, slow boot-ups and shutdowns, malfunctioning USB ports, slow performance, and many more. The SMC, along with PRAM, is responsible for many features of Mac. That’s why it’s best to reset PRAM and SMC on Mac at once.
Part 5: Prevent Common Mac Issues With Mac Cleaner
A PRAM or SMC reset is usually conducted to resolve issues correlated to these two subsystems. These may include issues like slow boot-ups, slow performance, or malfunctioning audio devices. However, one must keep in mind that not all Mac issues are caused by these two subsystems. In many cases, the issues occur due to other reasons, such as lack of storage space. If you’ve already reset PRAM and SMC on Mac but are still facing Mac issues, we suggest using Mac Cleaner.
Mac Cleaner is a Mac cleaner program that aims to eliminate unnecessary data on a Mac, thereby freeing up some storage space. By doing so, you can optimize the device and prevent Mac issues. Here’s how you can use this software:
Step 1. Launch Mac Cleaner on Your Mac Computer
First off, go to the official website of Mac Cleaner and download its installer, which should come as an executable file. Use this file to install the software on your computer. Once installed, open the Mac Cleaner program.
Step 2. Select from Six Different Modules
Mac Cleaner consists of six different modules. Each module has different functionalities, though some have similarities in how they work. Here’s a look at what each module does and how you can use them for your purposes:
- Clean Up Junk detects junk files on your Mac, which may include App Junk, Trash Bin junk, iTunes Junk, and System Junk. These are all unnecessary files that take up space, so it’s best to delete them to save storage space.
- Delete Large Files is similar to the Clean Up Junk module, except it only detects unnecessary files that are 50MB in size or larger. This module has a similar purpose as the previous one—to free more storage space on your Mac.
- Delete Duplicate Files locates all files that have one or more extra copies present on your Mac. It then lists these copies on the software and allows you to decide whether you want to delete them or not.
- Erase Private Data scans for “private” files, which may include your browsing history, mail attachments, and chat data, among many things. Its main goal is to prevent cyberattacks, so it won’t be as useful for your purposes.
- Speed Up Your Mac is the perfect module to prevent common Mac issues as it essentially performs various actions that optimize the performance of your Mac. These may include deleting unnecessary data and clearing your RAM.
- Manage Apps & Extensions allows you to uninstall applications and remove extensions on your Mac computer.
Though we normally recommend using only one module, since your goal is to prevent Mac issues, it’s best if you use all six modules, one at a time. This is because each one can bring a positive impact to your Mac that would then prevent Mac issues.
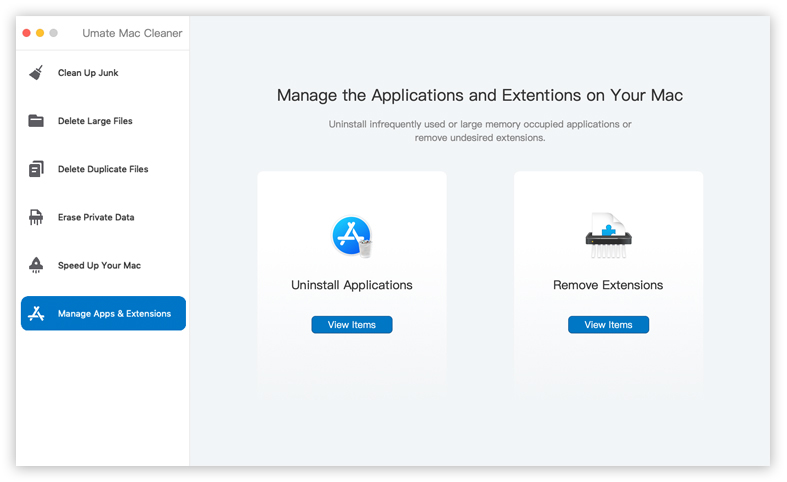
Step 3. Click The Scan/Start Now/View Items Button
Once you select a module, you’ll find a button at the center of the screen, which should say Scan, Start Now, or View Items. Simply click this button to proceed to the next step.
Step 4. Select An Item from The List
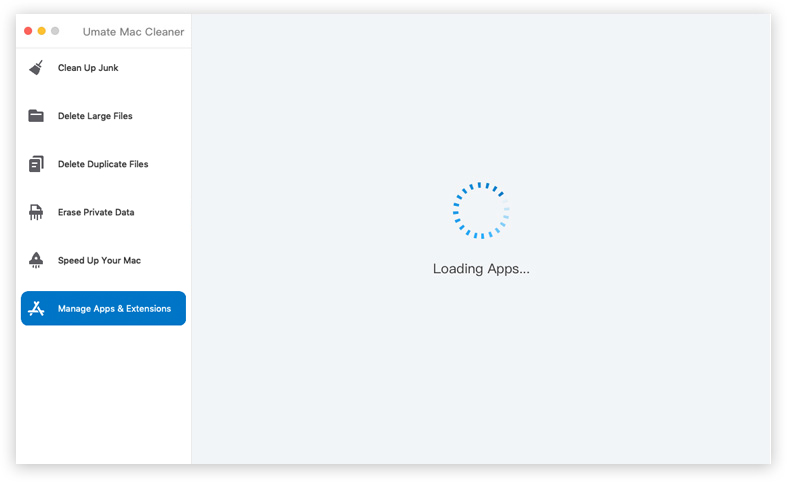
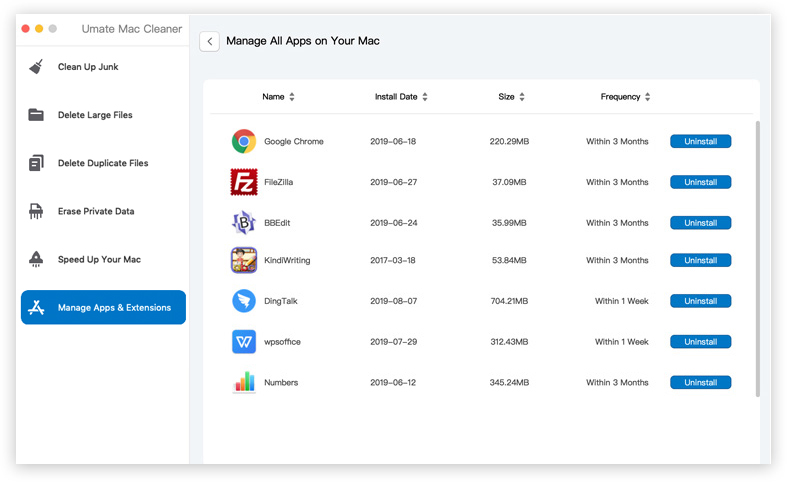
Upon clicking the button, the software will perform one of three actions depending on the module. (1) Scan for files, if you chose one of the first four modules, (2) detect actions that can be performed to optimize Mac performance, if you chose Speed Up Your Mac, or (3) scan for applications and extensions, if you chose Manage Apps & Extensions. Regardless of the module, the next screen will give you a list of items from which you can select and perform specific actions.
Step 5. Perform The Necessary Action
For the first action, you simply have to select the files you wish to delete, and then click the button at the top-right corner of the screen, which should say Clean, Delete, or Erase. For the second action, select an item and click the button at the top-right corner, which could be Disable, Deactivate, or Remove. Lastly, for the third action, you can select an item, which should either be an application or extension. Afterward, click the button to its right, which should say Uninstall or Remove.
With this, you can optimize the performance of your Mac, and consequently minimize the likelihood of Mac issues occurring. Of course, this won’t eliminate the possibility of issues or errors completely, but it should at least minimize it.
Parting Words
Much like any acronym, not many people know what PRAM or SMC are on Mac. However, these two subsystems have a lot more to do with your computer than you may think. In fact, if you’re encountering Mac issues, there’s a good chance these two subsystems have something to do with it, which is why it’s important to know how to reset PRAM and SMC on Mac to solve these issues. Of course, that doesn’t mean it’s solely responsible for all errors on Mac. There are many other reasons why you may encounter computer issues, though those issues should be fairly easy to prevent with Mac Cleaner.
Latest Articles