

Whenever you delete a file or folder on your computer, it goes to a directory in case you need to recover it for future use. All operating system has this feature. Windows PCs have the Recycle Bin, while Mac computers have the Trash. You can very easily access these directories since the icons are typically visible on the desktop or taskbar. However, in some cases, these directories may be hidden for some reason. Naturally, this will cause inconvenience whenever you want to recover a deleted file or folder. With that in mind, this article will discuss where you can find the Trash on Mac, and how you can open it.

Part 1: Where Is The Trash on Mac?
Where is the Trash on Mac? Unlike most apps on Mac, you can only find the Trash in one place, and that is the Dock. For your reference, the Dock is the area at the bottom of the screen where you can find different icons. It’s basically the Mac counterpart of the taskbar you see on Windows PCs. Perhaps the main difference is that the Dock, by default, has a couple of apps pinned.
Therefore, without changing any setting on your computer, you should be able to find the Trash icon on the Dock, which looks exactly like a recycle bin. But while there is only one place to find the Trash, there are several ways to open it.

Part 2: How to Open Trash on Mac
The easiest way to open the Trash on Mac is by simply clicking on its icon from the Dock. However, there are other ways to go about it. For instance, you can use the Finder app to go to the Trash directory. Here’s how you can do this:
- Open the Finder app on your Mac.
- From the menu bar at the top of the window, click Go.
- Select Go to Folder… from the resulting dropdown menu.
- A popup menu will appear. Type in ~/.Trash on the text field.
- Click the Go button.
With this, you should be able to go to the Trash folder and do what you must. You can also open the Trash by enabling the option in the Finder sidebar. By doing so, you’ll be able to find Trash from the left pane of the Finder app. By clicking on the Trash option, you can very easily open the folder. Here’s how you can add Trash to the Finder app sidebar:
- Open the Finder app.
- Instead of Go, click the File option this time.
- Select Add to Sidebar from the resulting menu.
- Enable the Trash option from the popup menu.

Part 3: How to Delete Other Junk Files Using Mac Cleaner
Knowing where the Trash is on Mac and how to empty it is indeed an important skill. After all, the Trash often ends up storing GBs worth of files after a while, which can drastically decrease your storage space. But it’s also important to understand that Trash isn’t the only place where you can find junk files. You can also find them in other folders on your Mac, and just like the contents of the Trash, they can take up a lot of storage space despite being unnecessary. If you truly want to free up space on your computer, you must also clear these junk files, and you can do so using Mac Cleaner.
Mac Cleaner is, as the name suggests, a cleaner software with various features. One such feature allows you to scan for deleted junk files on your computer with just a few clicks. Below is a guide on how to use Mac Cleaner:
Step #1: Download, Install, and Open Mac Cleaner
Open your browser then navigate to the Mac Cleaner website. Click Download Now to download the installer, which you must then use to install the software. Once the installation is complete, open the software on your computer.
Step #2: Pick the Clean up Junk Module
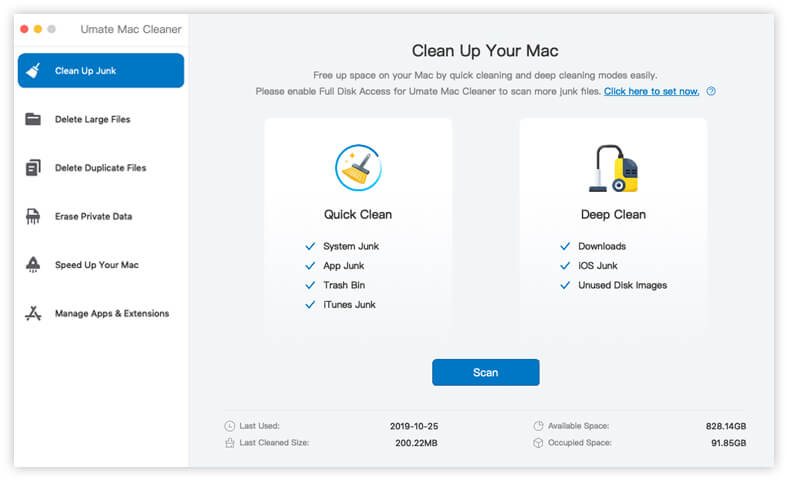
The Mac Cleaner software consists of a total of six modules, namely (1) Clean Up Junk, (2) Delete Large Files, (3) Delete Duplicate Files, (4) Erase Private Data, (5) Speed Up Your Mac, and (6) Manage Apps & Extensions. Since your goal is to delete all the junk files on your computer, the logical choice would be to select Clean Up Junk.
The Clean Up Junk module scans your computer for different kinds of junk, including System Junk, App Junk, iOS Junk, iTunes Junk, and even the Trash Bin Junk. It then allows you to delete these junk files so you can free up space on your computer.
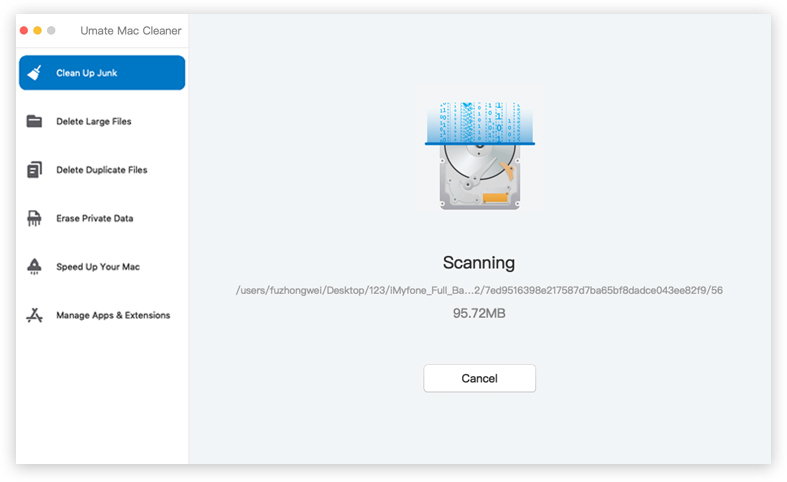
Step #3: Click Scan
Upon selecting Clean Up Junk, you’ll notice that the software changes form. It will then show you information about the module, which you can read if you want to learn more about the module. After that, click the Scan button at the bottom.
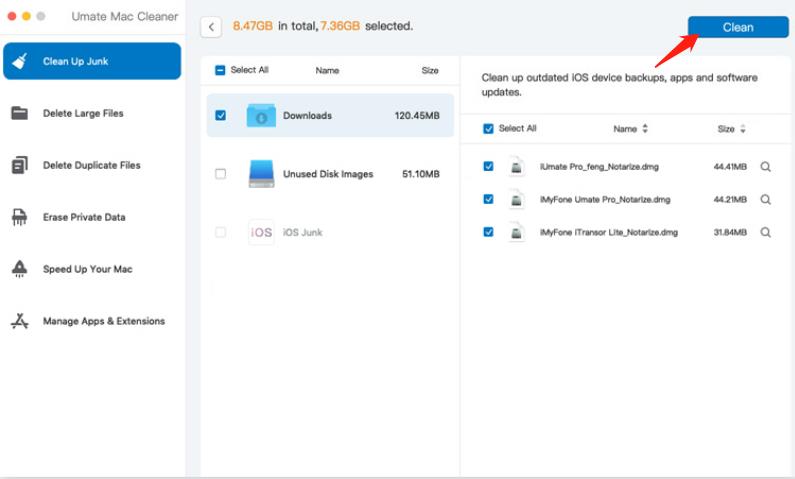
Step #4: Pick the Files You Want to Delete
After the scan is complete, you’ll find several items on the left side of the interface. These are the different categories of junk files (e.g., Downloads, iTunes Junk, System Junk, App Junk). Simply select a category from this list and you’ll get another list of items on the right side of the interface. This time, these items correspond to the files you can delete. Simply select the files you want to delete by clicking on their corresponding checkboxes. You can also click Select All to include all items.
Step #5: Delete the Files
Once you’ve selected all the files you want to delete, click the Clean button at the top-right corner of the interface. This will finalize the cleaning process. All that’s left is to wait for the software to finish the cleaning process, and you’re good to go.
With Mac Cleaner, you can very easily delete files that are similar to the contents of your Trash—unnecessary. Keep in mind that all the files you delete using this method won’t go to the Trash. They will be permanently deleted, so there’s no need to empty the Trash for these files.
Going Forward
Most Mac computers have a maximum storage capacity of 256GB. While that is indeed relatively large, it’s still completely possible to run out of space. That’s why it’s common practice to delete files from your computer every now and then. Of course, you must delete them again from the Trash to ensure they don’t take up space on your Mac. Now that you know where is the Trash on Mac, it should be a breeze, but keep in mind that doing so will permanently delete the file. That’s why it’s important to double-check whether what you’re deleting is important or not to avoid data loss.
Latest Articles