

If you’re looking to completely clear browsing history on MacBook and other online traces, Mac cleaner is a great solution. It’s an app that removes browser junk, caches, and your entire digital footprint. You can download the free version here. In the meantime, keep reading for more solutions.

What is browsing history on Macbook?
Browsing history is a record of the websites that you have visited using a web browser. It is usually stored locally on your device, but it can also be stored on a remote server, such as by your internet service provider. Browsing history can be useful for retracing your steps and finding websites that you have visited in the past, but it can also be a privacy concern because it can reveal your online activity to others.
How to clear Safari history manually
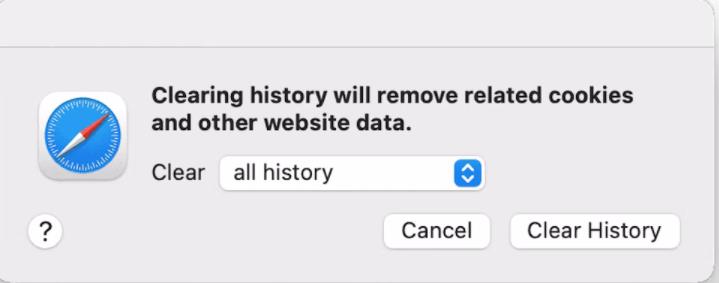
To clear your Safari browsing history manually on a Mac:
- Open Safari.
- Click on the “History” menu in the top menu bar.
- Select “Clear History”.
- In the window that appears, you can choose to clear your browsing history for the past hour, day, two days, or week. You can also choose to clear your browsing history for all time by selecting the “all history” option.
- Click “Clear History” to remove your browsing history.
To clear your Safari browsing history manually on an iOS device:
- Open the “Settings” app.
- Scroll down and tap “Safari”.
- Scroll down and tap “Clear History and Website Data”.
- In the window that appears, tap “Clear History and Data” to confirm.
Note: Clearing your browsing history will also clear your browsing cache, which can help to resolve some issues with web pages not loading correctly. It will not, however, clear your saved passwords or auto-fill information.
How to delete entire browsing history
To delete your entire browsing history, you will need to clear the history in each web browser that you have used. Here are the steps to delete your browsing history in some popular web browsers:
Google Chrome:
- Open Chrome.
- Click the three dots in the top-right corner of the window.
- Click “History” in the menu that appears.
- Click “Clear browsing data” on the left side of the page.
- In the window that appears, select the time range for which you want to clear your browsing history. You can choose to delete your history for the past hour, day, week, or month, or you can select “All time” to delete your entire browsing history.
- Check the boxes next to “Browsing history” and any other data that you want to delete.
- Click “Clear data” to delete your browsing history.
Mozilla Firefox:
- Open Firefox.
- Click the three lines in the top-right corner of the window.
- Click “History” in the menu that appears.
- Click “Clear Recent History” on the right side of the page.
- In the window that appears, select the time range for which you want to clear your browsing history. You can choose to delete your history for the past hour, two hours, four hours, or today, or you can select a custom range.
- Under “Details”, check the box next to “Browsing & Download History”.
- Click “Clear Now” to delete your browsing history.
Microsoft Edge:
- Open Edge.
- Click the three dots in the top-right corner of the window.
- Click “History” in the menu that appears.
- Click “Clear history” on the left side of the page.
- In the window that appears, select the time range for which you want to clear your browsing history. You can choose to delete your history for the past hour, day, week, or month, or you can select “All time” to delete your entire browsing history.
- Check the boxes next to “Browsing history” and any other data that you want to delete.
- Click “Clear now” to delete your browsing history.
Note: Clearing your browsing history will also clear your browsing cache, which can help to resolve some issues with web pages not loading correctly. It will not, however, clear your saved passwords or auto-fill information.
Opera History:
To clear your browsing history in Opera manually:
- Open Opera.
- Click the “Menu” button in the top-left corner of the window (it looks like three horizontal lines).
- Click “History” in the menu that appears.
- Click “Clear browsing data” on the left side of the page.
- In the window that appears, select the time range for which you want to clear your browsing history. You can choose to delete your history for the past hour, day, week, or month, or you can select “Beginning of time” to delete your entire browsing history.
- Check the boxes next to “Browsing history” and any other data that you want to delete.
- Click “Clear browsing data” to delete your browsing history.
Note: Clearing your browsing history will also clear your browsing cache, which can help to resolve some issues with web pages not loading correctly. It will not, however, clear your saved passwords or auto-fill information.
How to Delete Specific Pages from History
To delete specific pages from your browsing history, you will need to use the history feature of your web browser. Here are the steps to delete specific pages from your browsing history in some popular web browsers:
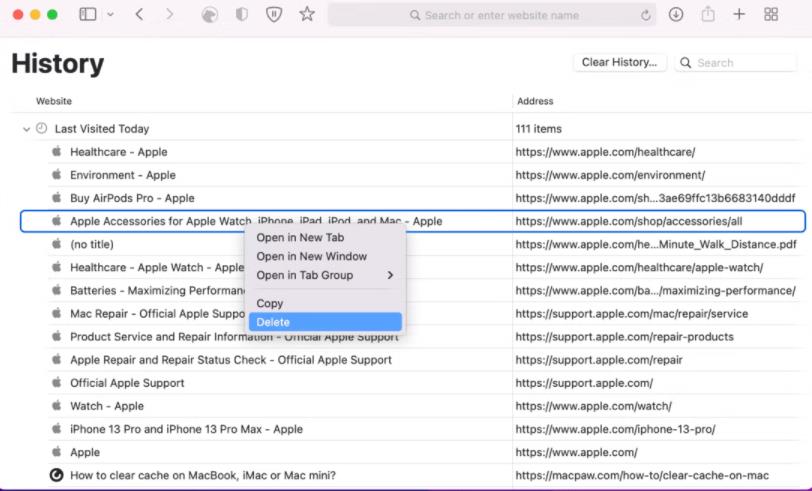
Google Chrome:
- Open Chrome.
- Click the three dots in the top-right corner of the window.
- Click “History” in the menu that appears.
- Find the page that you want to delete in the list of history items.
- To the right of the page, click the three dots.
- Click “Remove from history” in the menu that appears.
Mozilla Firefox:
- Open Firefox.
- Click the three lines in the top-right corner of the window.
- Click “History” in the menu that appears.
- Find the page that you want to delete in the list of history items.
- To the right of the page, click the three dots.
- Click “Delete” in the menu that appears.
Microsoft Edge:·
- Open Edge.
- Click the three dots in the top-right corner of the window.
- Click “History” in the menu that appears.
- Find the page that you want to delete in the list of history items.
- To the right of the page, click the three dots.
- Click “Delete” in the menu that appears.
Note: Deleting specific pages from your browsing history will not affect your browsing cache or any other data. It will also not affect your saved passwords or auto-fill information.
Why Can’t I Clear Browsing History on Macbook?
There are a few reasons why you might not be able to clear browsing history on your MacBook:
Incorrect steps: Make sure that you are following the correct steps to clear your browsing history. The steps can vary depending on the web browser that you are using.
Browser extensions: Some browser extensions can block you from clearing your browsing history or can add items to your history that cannot be deleted. Try disabling any extensions that you have installed and see if that fixes the issue.
Corrupted history file: If your browsing history file is corrupt, you may not be able to clear it. In this case, you may need to delete the history file and start fresh.
Permission issues: If you are trying to clear your browsing history on a device that is owned by someone else, such as a work computer, you may not have the necessary permissions to do so.
Third-party software: If you have installed any third-party software that is designed to track your browsing history, such as parental control software, you may not be able to clear your history through your web browser. You may need to disable or uninstall the software in order to clear your history.
Completely Clear Search History on Your Mac using Mac Cleaner
Step #1: Set up Mac Cleaner
To set up a Mac cleaner on your computer, follow these steps:
- Download the installer file from the developer’s website and double-click on it to start the installation process. Follow the on-screen instructions to complete the installation.
- Launch the cleaner: Once the cleaner is installed, launch it from the Dock.
Step #2: Select A Module
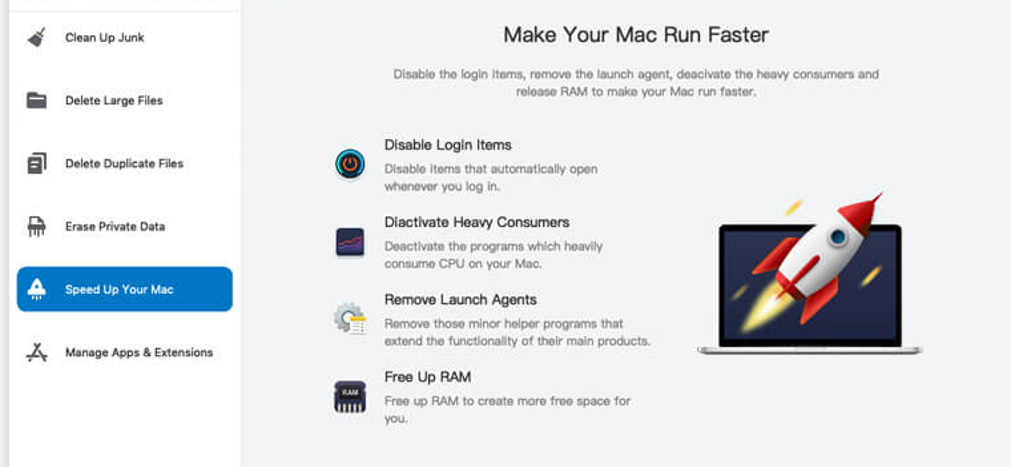
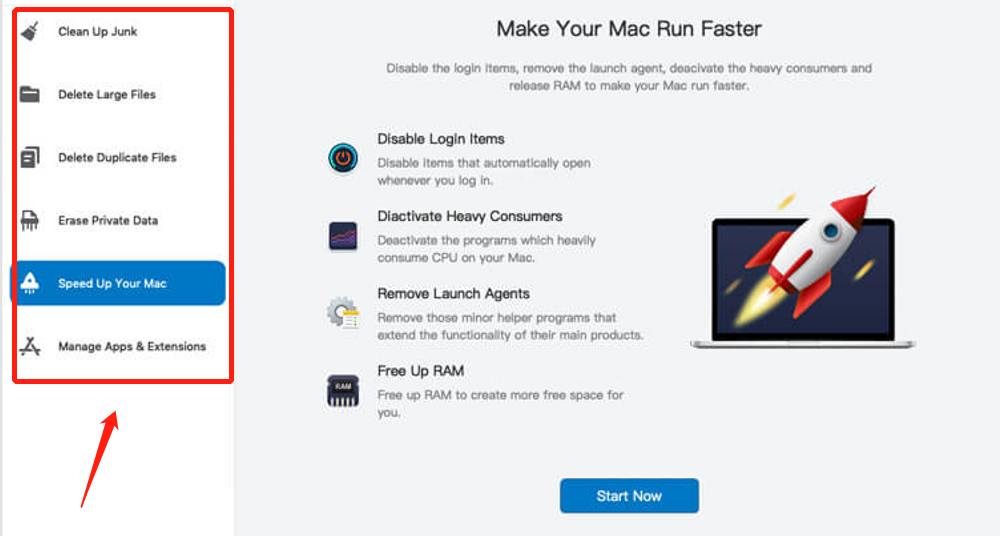
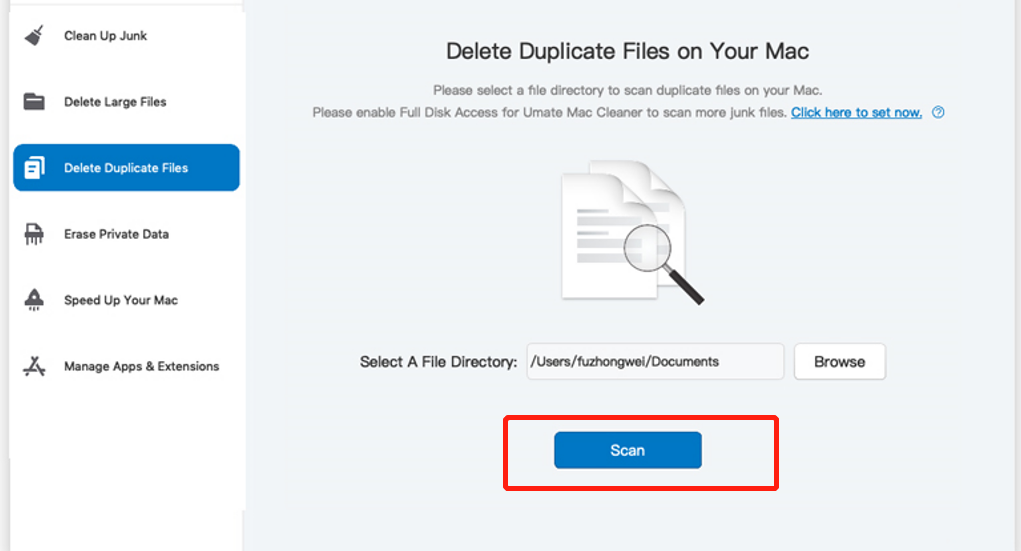
Six different options can be found on the left sidebar of the software, including (1) Clean Up Junk, (2) Delete Large Files, (3) Delete Duplicate Files, (4) Erase Private Data, (5) Speed Up Your Mac, and (6) Manage Apps & Extensions. We recommend selecting the Speed Up Your Mac module as it focuses on freeing up space on your Mac to improve its performance. Alternatively, you can choose to select each module individually to fully utilize the software.
Step #3: Scan for Files
A window will appear displaying all of the search engines that Mac Cleaner can clear the history for. Select the search engines that you want to clear the browser history for, or select “All” to clear the history for all search engines.
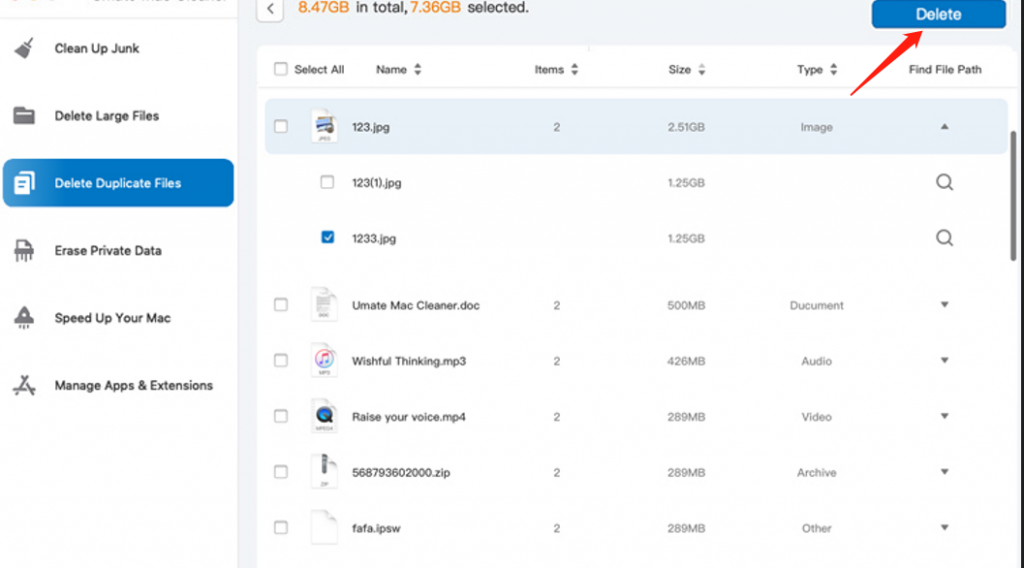
Step #4: Select And Delete The Files
To delete files, you can select them and then use the delete function on your device or computer. This can typically be done by pressing the “delete” button on your keyboard, or by right-clicking on the selected files and selecting “delete” from the menu. Some devices or operating systems may have slightly different methods for deleting files, so you may need to refer to the device or operating system documentation for specific instructions.
Conclusion
If you are sharing your Mac with someone else, it is important to clear your browser history to protect your privacy. Additionally, websites may save other data like cookies and cache that can track your online activity, so be sure to also clear these to maintain your security. In conclusion, clearing the search history on your Mac can help protect your privacy and free up space on your device. To clear search history from those, you may need to follow separate steps or use a different method.
Latest Articles