

Emailing is an excellent way to send someone a message. However, as instant messaging becomes more prevalent, email technology subsequently becomes less relevant. But if there is something emails can do that instant messaging platforms can’t, it’s that you can send large files along with emails. These are what we call attachments since to send large files, you must attach them to the email. Every platform has different methods to send an attachment, but it’s particularly confusing with Outlook’s macOS app. If that’s what you’ve been struggling with, here’s how to attach an email in Outlook for Mac users.
Note: There are a variety of versions of Outlook, so it makes sense that you’d be confused as to what to do to attach a file to your emails. With that said, we’ll take a look at a user guide for each version of Outlook on Mac, starting with the web version.
Part 1: User Guide for Outlook Web App
When someone says they want to attach a file to their email before sending it via Outlook, they typically mean several things.
For one, they might be talking about sending a message as an attachment. They might also only be referring to pictures, or in some cases, the ‘attachment’ they want to send is a document. Depending on the file type, the process will vary.
With that said, let’s first take a look at how to attach an email in Outlook for Mac via the Web app if you’re referring to pictures:
- Go to the Outlook website.
- On the site, click the blue button at the top-left corner that says New message.
- The email editor would then appear on the right side of the interface. There, find the icon that looks like a landscape. That icon should correspond to the Insert pictures inline button.
- Upon clicking the button, a popup window will appear. Simply navigate to the picture you want to attach.
- Select the picture, then click Open.
With this, you’d have already successfully attached a photo to the email. That’s all you need to do if you want to attach a picture. If you want to attach other file types, like documents or videos, here’s what you need to do, you must follow the exact same steps. The only difference is with step 3. Instead of the Insert pictures inline button, you must click the Attach button which should have a paper clip icon. The icon is located at the top of the email editor as well as at the bottom. Upon clicking the icon, select Browse this computer. At this point, you only have to follow steps 4 to 5 from the previous instructions.
Now, if you plan on attaching a message rather than files like photos or documents, you can easily do so by clicking on an existing message, then pressing Command + R or Ctrl + R to reply to it. That should attach the selected message automatically.
Part 2: User Guide for Outlook 2007, 2010, 2013, And Newer Versions
If you’re using the Outlook desktop app, then you’re either using 2007, 2010, 2013, or newer versions. Thankfully, the steps for all of these versions of Outlook are roughly the same. With that said, here’s how to attach an email in Outlook for Mac:
- Open the Microsoft Outlook program.
- Click File from the top menu bar.
- Select New from the resulting dropdown menu.
- Click Mail Message.
- Now look for the Message tab.
- Under the Message tab, look for the Include section.
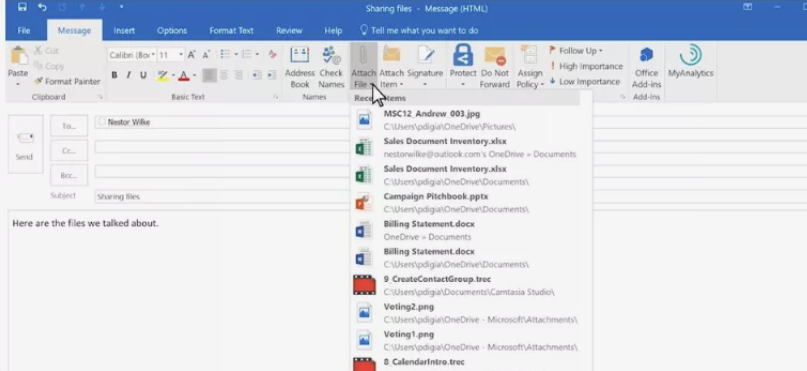
- Click the Attach button which should be represented by a paperclip icon.
- A dialog box should then appear. Navigate to the file you want to attach, select it, then click the Insert button.
With this, you can attach any kind of file. The steps for 2010, 2013, and newer versions of Outlook is roughly the same, though there are differences that might make the process a lot more burdensome if you didn’t know. After attaching the files, you should be able to find a list of attachments on your computer somewhere below the Subject section.
If you want a simpler method, then you can also try simply dragging and dropping the file you want to attach to the body of the message. This can work for multiple files as well. Just hold the Command key, then select all the files you want to attach.
That should allow you to select multiple items on your macOS computer. After they’re all selected, just drag them over to the body of the message, then release your left-click button. Now if you happened to attach the wrong file, you can remove the attachment by simply holding the Ctrl or Command key on your keyboard, then selecting the attachments you want to remove. Then, click the Remove button which should be represented by a trash icon.

Part 3: BONUS: Erase Email Attachments With Mac Cleaner
Since you already know how to attach an email in Outlook for Mac, there’s a good chance you’re going to do that very often from now often. If so, you must remember that whenever you open or send an email with an attachment, the Outlook app usually automatically downloads the file. As a result, the directory that contains emails may become full very soon, and you don’t want that to happen since you need to make sure there’s always space. To prevent that, try using Mac Cleaner.
Mac Cleaner is a cleanup software that allows you to get rid of unnecessary from your computer. And it just so happens that among the files you can delete, one of them is your email attachments. Here’s how you can use Mac Cleaner:
Step #1: Set up Mac Cleaner on Your Computer/Laptop
To start with, you need to install the software, and to do that, you must go to this link. It’s the software’s download site, and when you’re there, you’ll find a Download Now button. Click that button to download a DMG file, which should correspond to the software’s installer. When the download is complete, promptly open it to start the installation process. Follow the onscreen instructions from that point onward. The software should start automatically once the installation is finished.

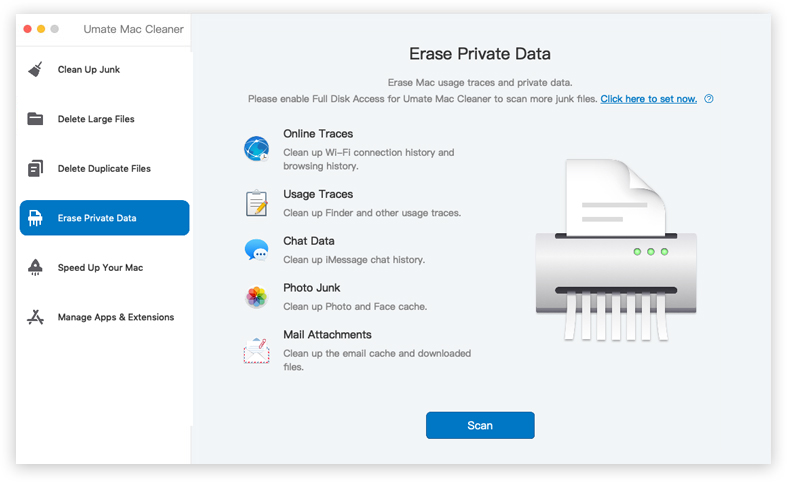
Step #2: Pick Erase Private Data
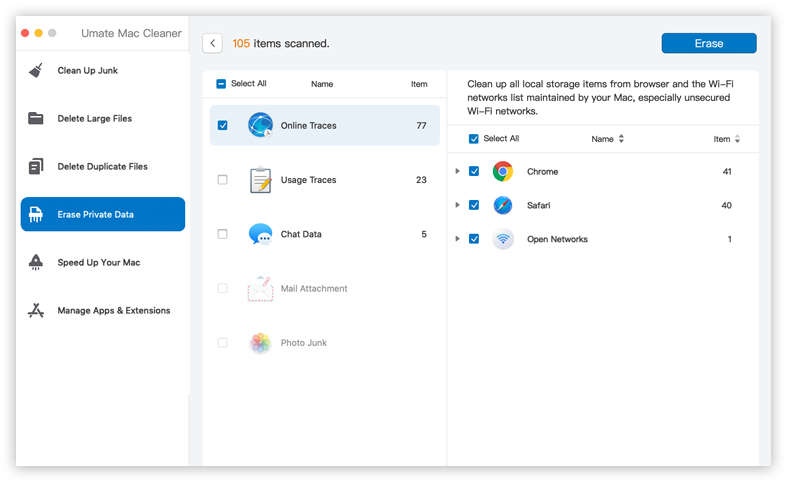
The next step would be to select a module. The software consists of six modules, namely (1) Clean Up Junk, (2) Delete Large Files, (3) Delete Duplicate Files, (4) Erase Private Data, (5) Speed Up Your Mac, and (6) Manage Apps & Extensions. Since you’re dealing with email attachments, you need the Erase Private Data since it allows you to delete files that contain private data. These include chat data, online traces, browser history, and most importantly, email attachments. You can select the module by clicking on it from the left side of the interface.
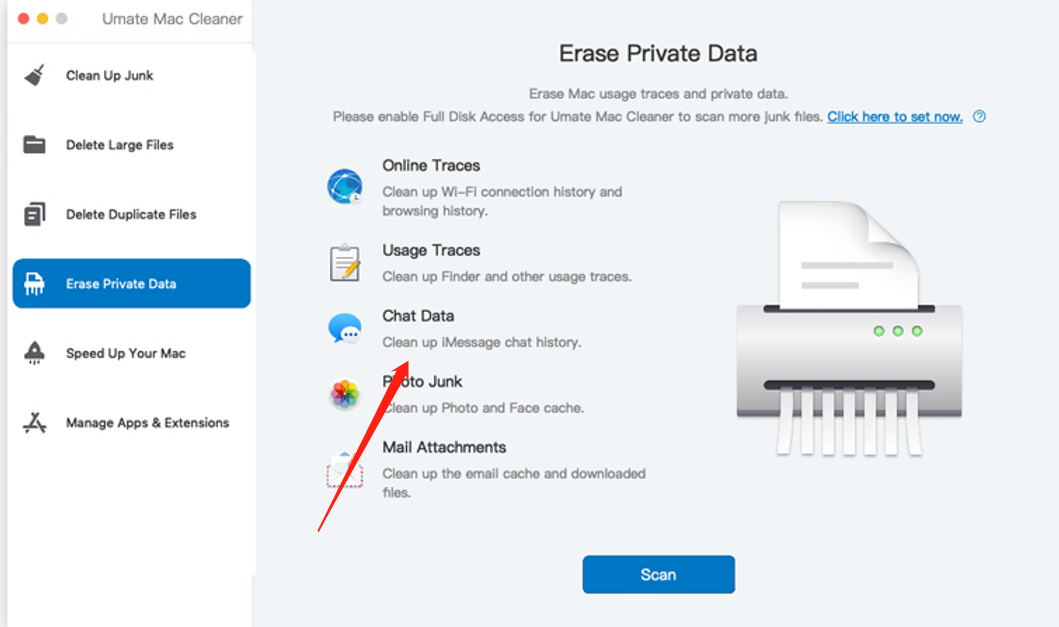
Step #3: Click Scan
Upon selecting the module, the software will display blocks of text explaining how the module works. You’ll also find a Scan button at the center of the interface. You can read the text if you want, but you must click the Scan button to proceed.
Step #4: Choose a File Category and File/s
The fourth step is to choose the files you want to delete, but before that, you must first select a file category from the list on the left side of the interface. There are a total of five file categories, and these include:
- Online Traces corresponds to the private data associated with your internet browsing, like the browsing history.
- Usage Traces corresponds to the data associated with your use of Finder.
- Chat Data corresponds to the data associated with your messaging apps.
- Photo Junk corresponds to the Face and Photo cache on your device.
- Mail Attachment corresponds to all the email attachments you have on your computer.
Since your main goal is to select get rid of the email attachments, obviously, you’ll have to choose Mail Attachment. Upon doing so, a new list will appear on the right side of the interface consisting of actual files. Select the ones you want to delete by clicking their corresponding checkboxes. You can also click the Select All box if you want to include all items.
Step #5: Delete the File/s
The final step in this process would be to click the Erase button located at the top-right corner of the window. After doing so, the software will take a few minutes to delete the files, so you may have to wait for a while.
With that, you can easily control how much space your email attachments are taking in the Outlook for Mac app.

Part 4: Final Words
As you can see, there are a variety of ways how to attach an email in Outlook for Mac. it depends on your situation, as each method is suitable for different kinds of scenarios. And since you now have your hands on Mac Cleaner, a program that can remove email attachments, you shouldn’t have any difficulty getting rid of the attachments if it ever comes to the point that it consumes too much space.
Latest Articles