

Images don’t typically take too much storage space on a device. The average size is around 100 to 500KB, and each image rarely reaches a size of 1 MB. For that reason, the album is usually not the first thing people go to when they want to delete files to free up space on their computer. However, it’s a different story if we’re talking about screenshots. This is because unlike photos taken using a camera, screenshots take up a huge amount of storage space, 3 to 5 MB, to be exact. In other words, if you regularly take screenshots on your computer, they can very easily pile up to a few GBs worth of storage space.
Of course, you don’t want screenshots taking too much of your storage space, especially if you don’t need most of them. With that in mind, this article will teach you how to delete screenshots on Mac, but first, is it possible to only target screenshots?
Article Navigation:
Part1: Can You Delete Screenshots Specifically on Mac?
Part2: Delete Screenshots on Mac from The Desktop
Part3: Delete Screenshots on Mac Using Storage Management
Part4: Free up Space on Your Mac With Mac Cleaner
Part1: Can You Delete Screenshots Specifically on Mac?
The answer to that question can be a bit ambiguous. Though it’s possible to delete screenshots, much like any other file type, it isn’t possible to delete them specifically. There’s actually no feature in Mac that allows you to specifically find and delete screenshots on your computer. To delete them, you must find the screenshots manually, which is typically the hardest part of the process. Deleting them is usually not an issue as you simply have to press the Delete key once you find them. The good news is that unless you made a significant change to your Mac’s settings, finding screenshots should be relatively easy.
Part2: Delete Screenshots on Mac from The Desktop
As stated earlier, you must first find the screenshots. There are several ways to approach this. The first approach is to simply look at the default location of screenshots, which is the Desktop. The file name of the screenshot should be Screen Shot [date] at [time]. If you see files with this name on the Desktop, then you haven’t changed the default location. If so, deleting the screenshot would be easy. Simply select the screenshots on the Desktop, then press Delete. But if there aren’t any files of that name there, take a screenshot. Doing so will allow you to determine the reason why there isn’t a file of that name.
It might be that the default location for screenshot files was changed, or you haven’t taken a screenshot yet. If upon taking a screenshot, a file appears on your Desktop, then the default location is still unchanged, and you simply haven’t taken a screenshot yet. If no file appeared on the Desktop, then you most likely already changed the location previously.
Part3: Delete Screenshots on Mac Using Storage Management
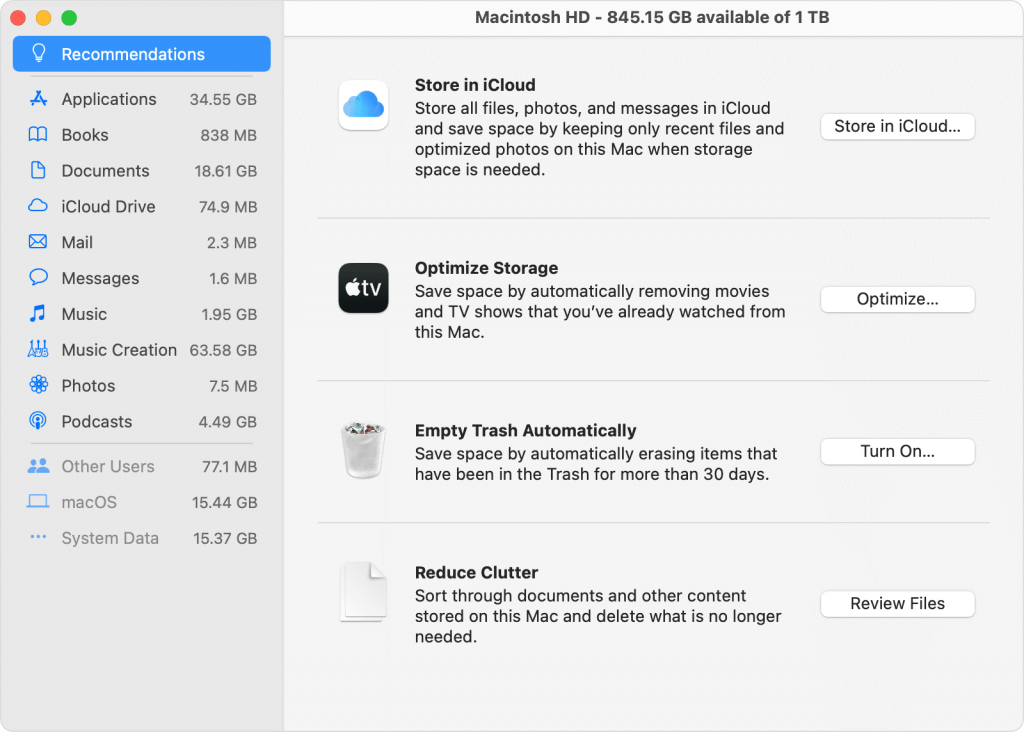
If the screenshots aren’t on the Desktop, then it’ll be difficult to find them since they can be anywhere. An easy solution to this would be to use the Storage Management feature. Here’s how to delete screenshots on Mac using this particular feature:
- Click the Apple logo on the top-left corner of your computer.
- Select About This Mac.
- Navigate to the Storage tab.
- Click the Manage… button.
- From the left sidebar, click Photos.
You’ll find a list of items. These are the photos that your computer currently has that are most likely unnecessary. There’s a good chance some of these are screenshots scattered across your computer.
- Hover over the items you think is screenshots.
Upon hovering on an item, two icons will appear. The X icon allows you to delete the file, while the glass magnifying glass icon will take you to the folder from which the file can be found.
- Click X to delete the file, or click the magnifying glass to find the screenshots that are possibly in the same folder as the one in the list. If they are, select the ones you wish to delete and press Delete on your keyboard.
Part4: Free up Space on Your Mac With Mac Cleaner
While screenshots can take up a huge amount of disk space on your computer, they’re most definitely not the most storage-hungry files on your drives. There are some potentially larger files that people often overlook. Library files, system cache, and downloads are just a few examples of such files. If left unattended, these can consume several GBs worth of space on your computer. Of course, if you wish to free up space on your Mac, you’ll have to delete these as well, but the approach would be a lot different than when you delete screenshots. For this, you’ll need a tool like Mac Cleaner.
Mac Cleaner is a modular software with several features, most of which allows you to get rid of unnecessary files from your computer. For that reason, it’s the ideal tool for freeing up storage space. Here’s how you can use the software.
Step #1: Set Up Mac Cleaner on Your Computer
Before anything else, you must first download the software. To do so, you need to open a browser and navigate to the Mac Cleaner download page. Click the Download Now button at that site to download a file. This is the installer that you must use to install the cleaner tool on your computer. The software should open automatically upon installation.
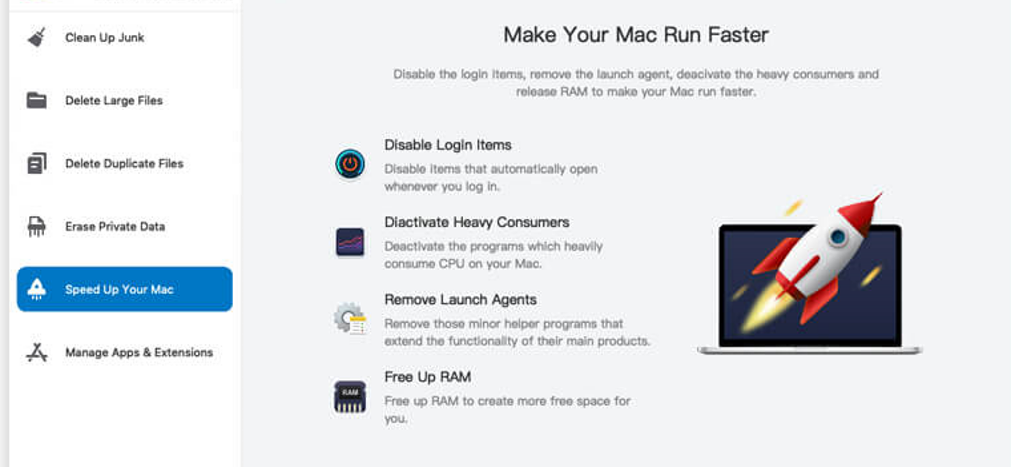
Step #2: Pick a Module
There are a total of six modules in Mac Cleaner. These are (1) Clean Up Junk, (2) Delete Large Files, (3) Delete Duplicate Files, (4) Erase Private Data, (5) Speed Up Your Mac, and (6) Manage Apps & Extensions. Though all modules have their own features, for our purposes, we’ll only use the first three as they are the most effective for deleting unnecessary files like screenshots. Here’s a look at each of these three modules and how they can help you:
- Clean Up Junk scours your storage drives for any junk file it can find. This may include System Junk, App Junk, iTunes Junk, iOS Junk, Trash Bin, and more. It only detects unnecessary files, so it cannot cause data loss.
- Delete Large Files looks for files that have a size of over 50MB. For that reason, it’s not effective for finding screenshots, but it’s an excellent way to delete other files that might be hogging the storage space of your computer.
- Delete Duplicate Files looks at each file within a folder and determines whether it has a copy somewhere on the computer or not. It then lists these files and allows you to delete them, eliminating duplicates on your Mac.
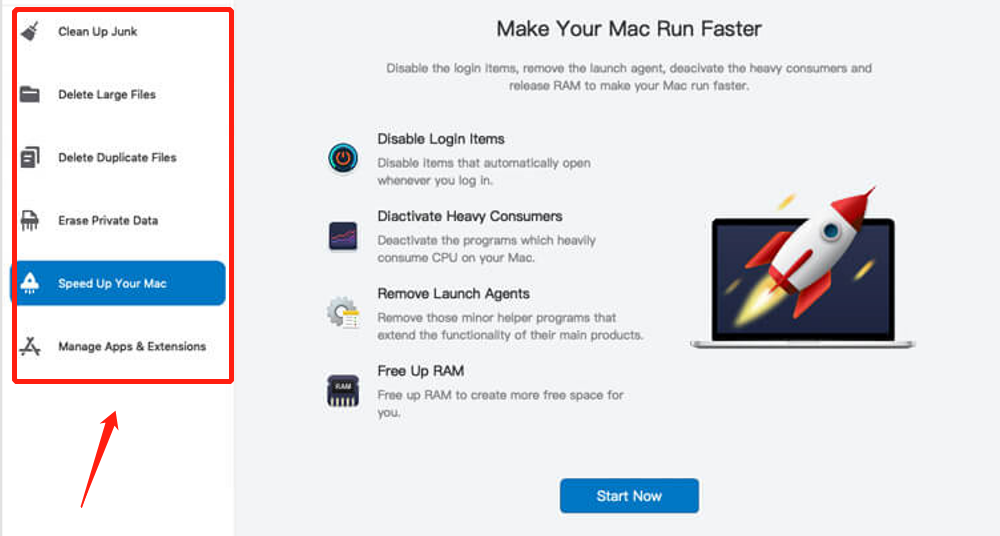
Simply select a module out of these three. You can select the others once you’re done with your current module, so there’s no need to be conservative with your decision. To select a module, just click on it from the left-hand side where it’s found.
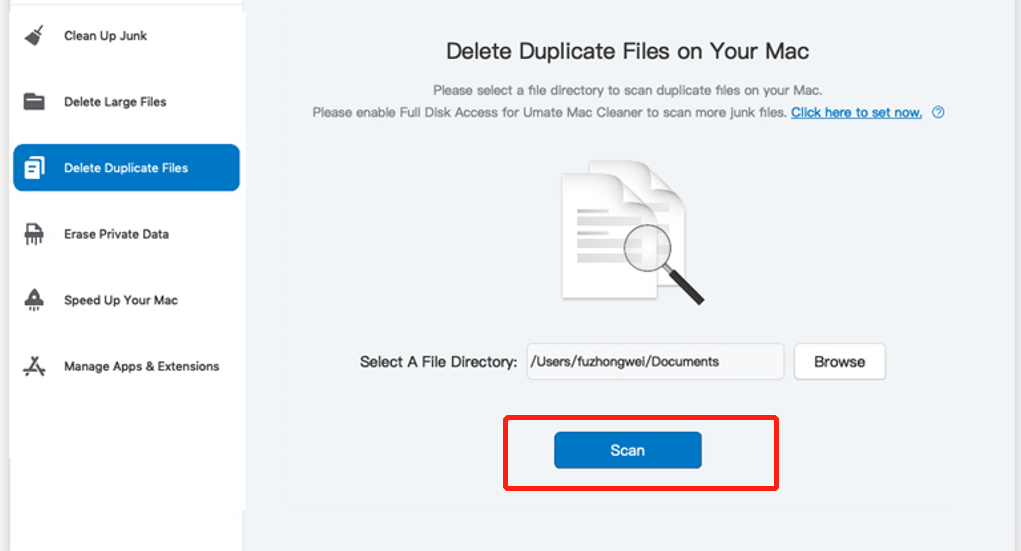
Step #3: Click the Scan Button
Upon selecting a module, you’ll notice a change in the software as it should now display information about the selected module. You can read it if you want to learn about its features. But once you’re done, you need to click the Scan button, though, for Clean Up Junk, you’ll have to select between Quick Clean and Deep Clean first. Each option will scan for different types of files and the software should mention this. As for Delete Duplicate Files, you need to specify a folder first by clicking the Browse button to the side of the Select a File Directory field and head to the directory you wish to scan.
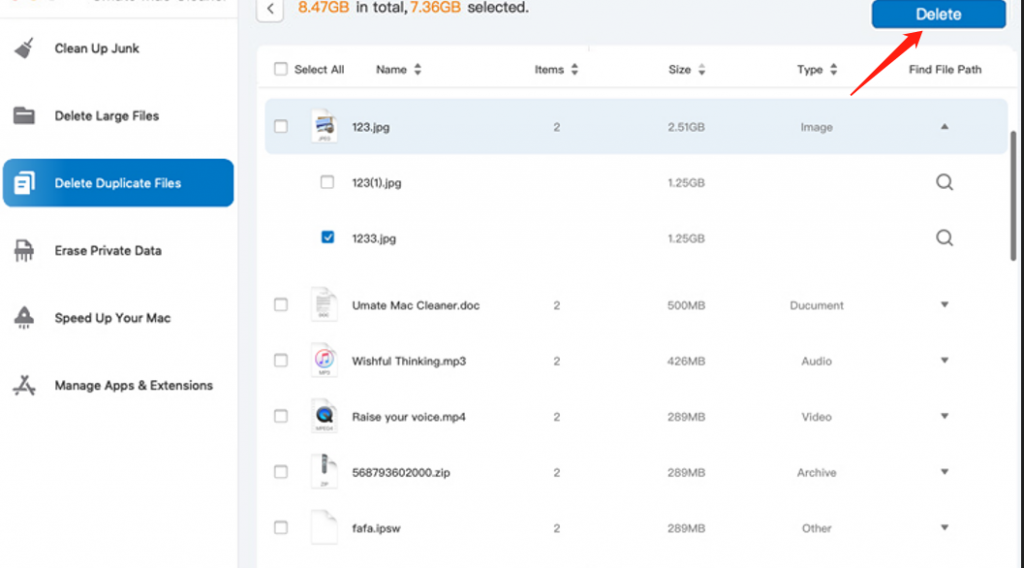
Step #4: Pick an Item/File
Once the scan is complete, you’ll get a list of items. These are the files you can delete. Simply select the ones you wish to delete by clicking on their corresponding checkboxes. But before you do that for Clean Up Junk, you have to first select a file category, which may include System Junk, Downloads, Trash Bin, and such. Only then will you be able to get a list of the files from the right side of the software. Simply select from there. You can also click the checkbox for Select All to select all items.

Step #5: Delete the Selected Files
Finally, click the blue button at the upper-right corner of the interface which should either say Clean or Delete. This should finalize the process by deleting the items you have selected in Step #4.
That’s pretty much how you delete unnecessary files on your computer. It’s simple, easy, and quick, not to mention it also scans every nook and cranny of your computer, so there’s only a small chance an unnecessary file can be left behind.
Closing Thoughts
Once you deleted all the screenshots on your Mac computer, you’ll find out how much storage space they actually consume as you look at how much storage space you freed up during the operation. The best part is it’s actually fairly easy to scan your computer for screenshots and delete them accordingly, despite what most people think. Of course, this would require you to actually know what you’re doing, which is exactly what this guide is for. Furthermore, you can use software like Mac Cleaner to take it up a notch and delete other unnecessary files to further free up space on your computer.
Latest Articles