

In our digital age, where our smartphones serve as our personal assistants, storage management has become crucial. Just like your computer, your iPhone has a trash or recycle bin that stores deleted files. It’s important to regularly empty this trash to free up valuable space on your device. In this blog post, we’ll guide you through the process of emptying the trash on your iPhone, ensuring you have more storage for the things that matter.
Delete Photos from iPhone
Step 1: Accessing the “Recently Deleted” Album:
Open the Photos app on your iPhone, which can be found on your home screen.
At the bottom, tap on the “Albums” tab to view all your albums.
Scroll down the list and locate the album named “Recently Deleted.” Tap on it to access the contents.
Step 2: Reviewing Deleted Photos and Videos:
Inside the “Recently Deleted” album, you’ll find a collection of deleted photos and videos.
Take a moment to review the items in the album. This step ensures that you don’t accidentally delete any important files.
Step 3: Deleting Photos and Videos Permanently:
If you wish to delete individual photos or videos, tap on the item to open it.
Once opened, you’ll see options at the bottom of the screen. Tap on the trash bin icon.
Confirm the deletion by tapping “Delete Photo” or “Delete Video.”
Step 4: Emptying the Entire “Recently Deleted” Album:
- To delete all the items in the “Recently Deleted” album at once, tap on the “Select” button located at the top right corner of the screen.
- A small circle will appear on each item. Tap on each circle to select the photos and videos you want to permanently delete. Alternatively, you can choose “Select All” at the top left corner to delete everything.
- Once you’ve made your selections, tap on the “Delete” button at the bottom right corner of the screen.
- Confirm the deletion by tapping “Delete [number of items].”
Step 5: Emptying the “Recently Deleted” Album Permanently:
- After confirming the deletion, all selected photos and videos will be removed from your iPhone.
- However, they are still recoverable until you permanently remove them. To do this, exit the Photos app and navigate to the “Settings” app on your home screen.
- Scroll down and tap on “Photos.”
- Under the “Photos” settings, you’ll find an option called “Recently Deleted.” Tap on it.
- In the “Recently Deleted” section, tap on “Delete All” to remove all the items permanently.
- Confirm the deletion by tapping “Delete [number of items].”
Delete Mail on iPhone
Deleting mail on an iPhone is a straightforward process. Follow the steps below to delete mail from your iPhone:
- Open the “Mail” app on your iPhone, which is represented by a blue envelope icon.
- From the mailbox list, tap on the mailbox or email account that contains the emails you want to delete. This can be your Inbox, Sent, Drafts, or any other folder.
- Once you are in the desired mailbox, browse through the list of emails and locate the email(s) you want to delete.
- To delete a single email, swipe left on the email until the red “Delete” button appears. Tap on “Delete” to remove the email. Alternatively, you can tap on the email to open it and then tap on the trash can icon at the bottom.
- To delete multiple emails at once, tap on the “Edit” button located at the top-right corner of the screen.
- Now, select the emails you want to delete by tapping on the circles next to each email. A checkmark will appear for the selected emails.
- After selecting the desired emails, tap on the trash can icon (usually at the bottom or top of the screen) to delete the selected emails.
- If prompted, confirm the deletion by tapping on “Delete” or “Trash.” This will permanently remove the selected emails from your iPhone.
Remember that deleting emails from your iPhone only removes them from the device and not from the email server. The emails will still be accessible from other devices or email clients linked to the same email account. By following these simple steps, you can keep your email inbox organized and clutter-free on your iPhone.

Optimize iPhone Storage
Optimizing storage on your iPhone can help free up space and improve device performance. Here’s a guide on how to optimize iPhone storage:
Enable iCloud Photos:
- Go to “Settings” on your iPhone.
- Tap on your Apple ID at the top of the screen.
- Select “iCloud” and then “Photos.”
- Toggle on “iCloud Photos” to enable it. This will automatically upload your photos and videos to iCloud, freeing up space on your device.
Offload Unused Apps:
- Navigate to “Settings” and tap on “General.”
- Select “iPhone Storage.”
- You’ll see a list of apps and the space they occupy.
- Tap on any app you don’t use frequently.
- Choose “Offload App” to remove the app from your iPhone but retain its documents and data. This allows you to reinstall the app later without losing your information.
Enable Optimize iPhone Storage for Messages:
- In “Settings,” go to “Messages.”
- Scroll down and turn on “Messages in iCloud.”
- Enable “Optimize Storage.” This will store older message attachments in iCloud while keeping recent ones on your device.
Use iCloud Drive:
- Open “Settings” and tap on your Apple ID.
- Select “iCloud” and then “iCloud Drive.”
- Toggle on “iCloud Drive” to enable it. This allows you to store files and documents in iCloud, reducing local storage usage.
Delete Unnecessary Files and Apps:
- Regularly review your iPhone’s storage usage in “Settings” > “General” > “iPhone Storage.”
- Tap on individual apps to see if there are files or data you no longer need.
- Delete unnecessary files, such as old documents, podcasts, or downloaded media.
Stream Music and Videos:
- Use streaming services like Apple Music or Spotify instead of storing large music libraries on your iPhone.
- For videos, opt for streaming platforms like Netflix or YouTube rather than storing video files locally.
Clear Safari Data:
Open “Settings” and go to “Safari.”
Tap on “Clear History and Website Data” to remove browsing history, cookies, and cache.
Manage Offline Reading List:
In “Settings,” select “Safari” and then “Offline Reading List.”
Clear items you no longer need for offline reading.
Reset Settings:
- As a last resort, you can reset your iPhone’s settings to default.
- Go to “Settings” > “General” > “Reset” and select “Reset All Settings.”
- Note that this action doesn’t delete your data but resets preferences like Wi-Fi networks, notifications, and display settings.
By following these steps, you can optimize your iPhone’s storage, creating more space for new content and enhancing overall performance.
Delete Notes on iPhone
- Deleting notes on an iPhone is a simple process. Here’s a step-by-step guide on how to delete notes on your iPhone:
- Open the “Notes” app on your iPhone. It is represented by a yellow icon with a white notepad.
- From the list of notes, locate the note you want to delete. You can browse through your folders or use the search function at the top to find a specific note.
- Tap on the note to open it in full view.
- Once the note is open, tap on the trash can icon located at the bottom of the screen. It is usually represented by a bin or garbage symbol.
- Confirm the deletion by tapping on “Delete Note” or “Delete” in the pop-up confirmation window.
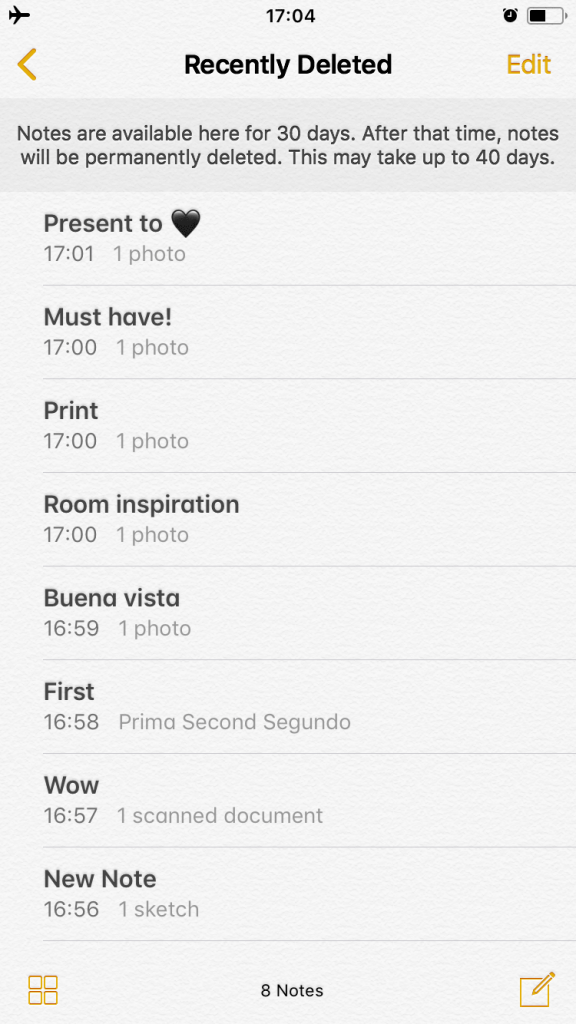
- The note will now be moved to the “Recently Deleted” folder within the Notes app. It will remain there for 30 days before being permanently deleted.
- If you want to delete the note permanently and immediately, you can go to the “Recently Deleted” folder by tapping on the back arrow at the top-left corner of the screen.
- Inside the “Recently Deleted” folder, you’ll find a list of notes you have deleted. Tap on “Edit” at the top-right corner.
- Now, select the note(s) you want to delete permanently by tapping on the circles next to each note. A checkmark will appear for the selected notes.
- After selecting the desired notes, tap on the “Delete” button at the bottom-left corner of the screen.
- Confirm the permanent deletion by tapping on “Delete [number of notes]”.
- The selected notes will be permanently removed from your iPhone, and they cannot be recovered after this step.
By following these steps, you can easily delete notes on your iPhone, helping you keep your notes organized and decluttered.
Empty Trash on iPhone with Mac Cleaner
Although there are various methods to empty trash on iPhone, they often come with downsides. They can be either too complex or prone to leaving some files behind, potentially causing data loss. This can be frustrating considering the time and effort required. That’s why using Mac Cleaner might be the best solution.
Mac Cleaner is specialized cleaning software that excels at deleting certain files, including temp files. It serves as the perfect tool for emptying trash on an iPhone. Here’s how you can utilize the software:
Step 1: Install Mac Cleaner on Your Computer
Visit the Mac Cleaner download site using any browser on your computer. Download the installer DMG file and open it. Follow the onscreen instructions to install the software.
Step 2: Select “Clean Up Junk”
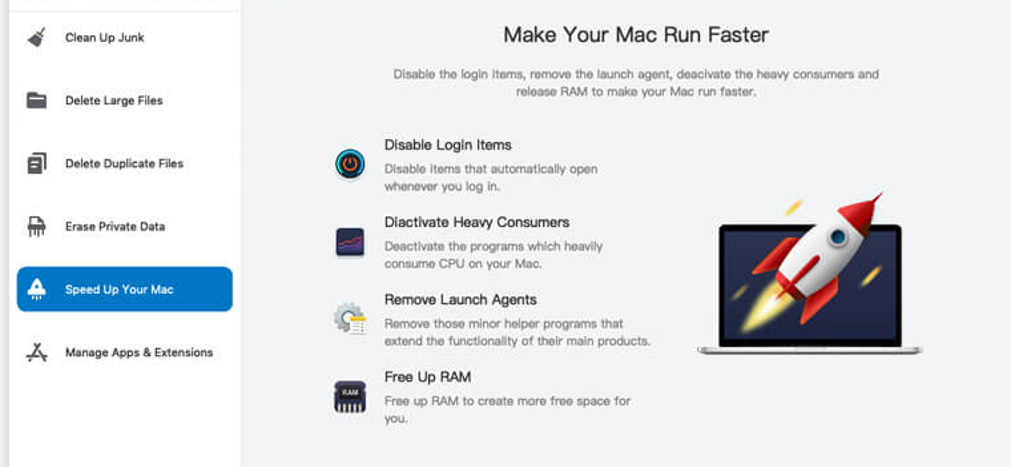
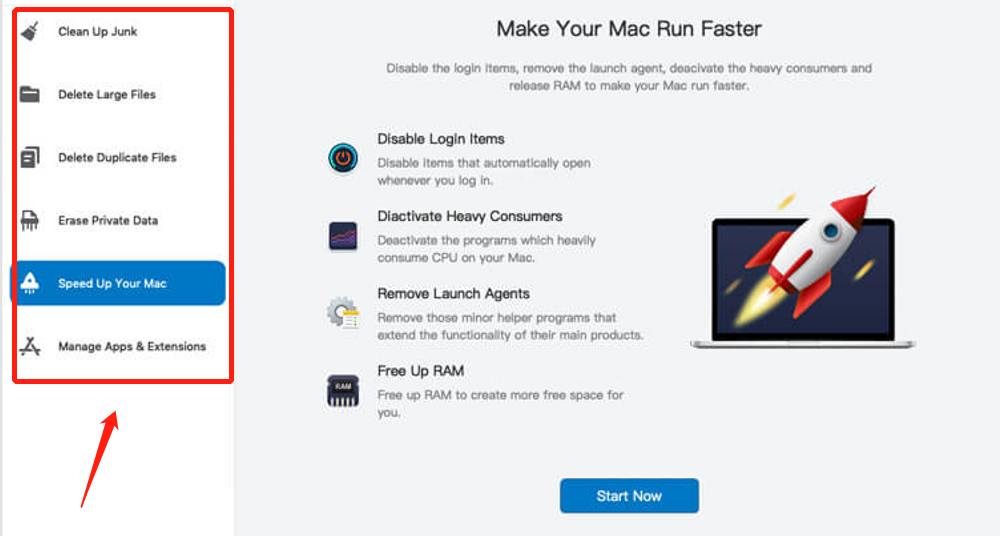
Within the software, you’ll find six options on the left side: Clean Up Junk, Delete Large Files, Delete Duplicate Files, Erase Private Data, Speed Up Your Mac, and Manage Apps & Extensions. For this purpose, you only need the Clean Up Junk module, which scans for junk files such as System Junk, App Junk, Trash Bin, iOS Junk, iTunes Junk, and temp files. Simply click on the Clean Up Junk module from the left-hand side.
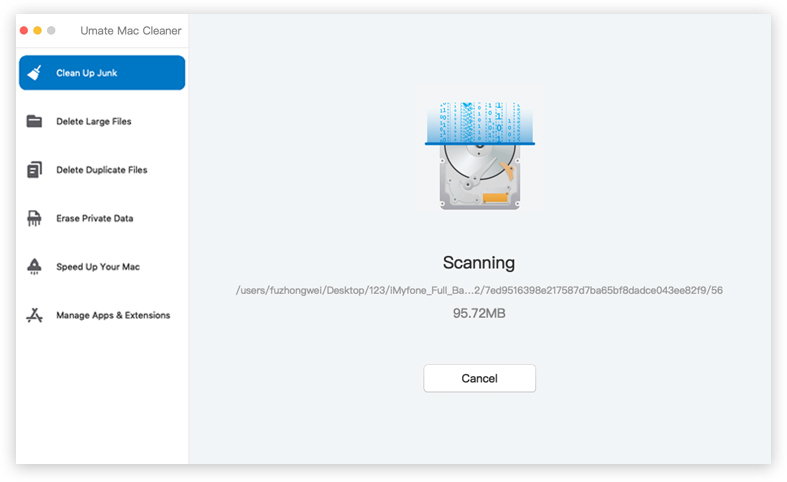
Step 3: Click the Scan Button
After selecting the module, the software will transform into a two-sided window displaying Quick Clean and Deep Clean options. Quick Clean scans for System Junk, App Junk, Trash Bin, and iTunes Junk. Deep Clean includes those files as well as Downloads, iOS Junk, and Unused Disk Images. Although temp files should be covered by Quick Clean, it’s recommended to choose Deep Clean for thoroughness. Click the Scan button at the bottom to proceed.
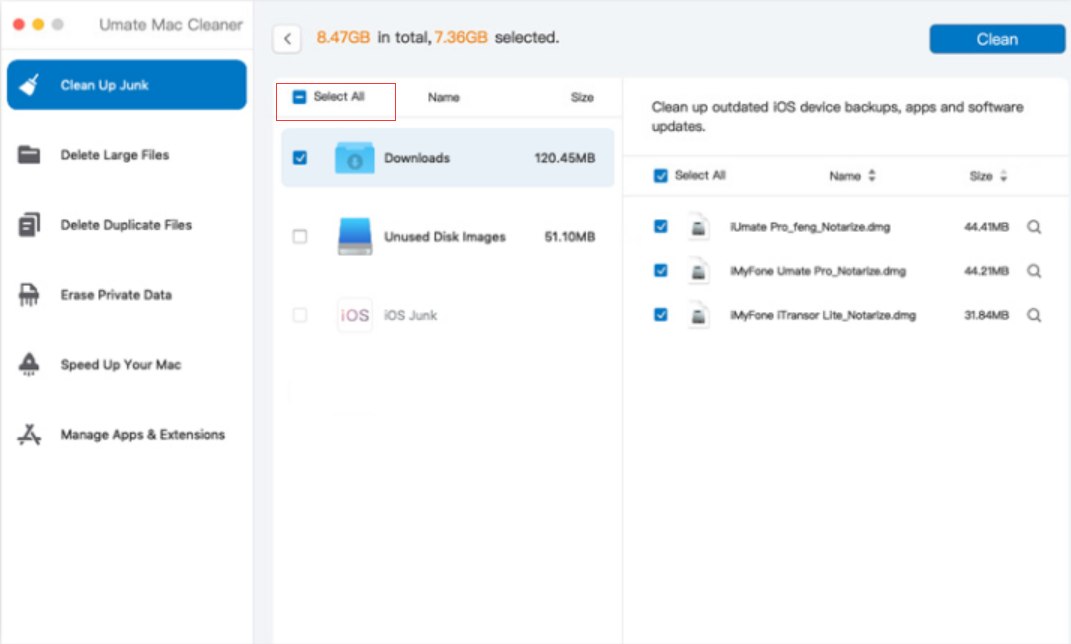
Step 4: Select File Categories and Files
A list of items will appear on the left side, representing the categories mentioned earlier (System Junk, Downloads, Trash Bin, Unused Disk Images, etc.). Choose a category, and the right side will display the corresponding files. Select the desired files by checking their checkboxes, or click Select All to delete everything in the list.
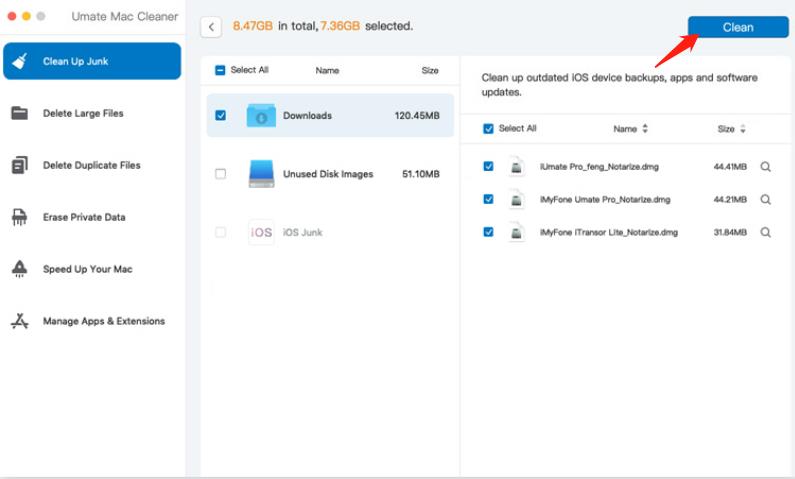
Step 5: Click the Clean Button
To delete the selected files, click the Clean button located at the top-right corner of the interface. It may take some time to finish deleting the files, so please be patient. By following these steps, you can easily empty trash on your iPhone while also deleting other problematic files similar to temp files. In other words, Mac Cleaner allows you to free up space on your computer effortlessly.
Mac Cleaner provides a convenient solution for emptying trash and optimizing storage on your iPhone. With its user-friendly interface and powerful features, you can effectively manage your device’s storage and improve its overall performance.
Conclusion
Regularly emptying the trash on your iPhone is a simple but essential step in managing your device’s storage. By following this step-by-step guide, you can free up space on your iPhone and ensure that you have room for new memories and files. Remember to review the contents of the “Recently Deleted” album before permanently deleting them. Enjoy a clutter-free iPhone experience!
Latest Articles